Deploying React application with AWS Amplify
AWS has long allowed users to host their static websites using S3 buckets. While this is a very simple and reliable solution, sometimes there is a need for a more complex application. AWS addresses this need with AWS Amplify Gen 2. In this article, I'm going to show you how to create and serve a React application utilizing its power.

What is AWS Amplify? #
As AWS puts it:
Amplify Documentation
AWS Amplify is everything frontend developers need to develop and deploy cloud-powered fullstack applications without hassle. Easily connect your frontend to the cloud for data modeling, authentication, storage, serverless functions, SSR app deployment, and more.
All this sounds very modern, fancy, and desirable. But that's not what I want to hear. In fact, I'm more interested in how it works, what opportunities this service creates for me as an engineer, and how it can improve or simplify existing solutions. Let's take a look.
The bulk of Amplify's functionality is built around TypeScript and its frameworks. This allows a huge number of JavaScript developers to use a familiar language to build full-stack applications, including their UI. Amplify handles the chores of setting up, configuring, and maintaining the underlying infrastructure, deploying, and hosting the application, leaving developers to focus solely on writing the code.
Amplify supports connections to several Git providers: CodeCommit (of course), GitHub, GitLab, and Bitbucket. Integration with VCS simplifies development, as each new branch maps directly to a new environment. This makes it easier to use multiple preview branches simultaneously without needing to configure each environment separately.
This approach isn't new in the public cloud space oriented toward JavaScript development. Several major players, such as Vercel, Fly.io, Netlify, and Heroku (to name a few), have been providing similar functionality for quite some time. Some have even gone as far as creating their own framework for web applications[1].
So, what does AWS Amplify offer that its competitors don't already have?
I feel that the most important Amplify's advantages is that it's an AWS product. This is evident in its preconfigured integration with services like Cognito for authentication, DynamoDB for data storage, S3 for document storage, AWS Lambda for function execution, and many, many more[2].
Another nice bonus from AWS is the ability to configure your own hosted zone using Route 53, which simplifies domain name management. You can create as many domains and subdomains as you like, all automated through Amplify. And the cherry on top: automated TLS certificate management. No more Certbot crons -- just seamless HTTPS!
Deploying React application with Amplify #
I learned about Amplify while browsing through my buckets for a previous[3] post. As you might know, my website is statically hosted on S3. In this configuration block, AWS now displays a plaque suggesting deploying a website using Amplify as a more modern approach.
I decided to give it a try and compare the results. This experiment led to the creation of a beta[4] version of my landing page. The entire process took surprisingly little time. Amplify handles CloudFront configuration and helps set up proper domain names (both in Route 53 and on external services).
Instead of the traditional setup -- creating a bucket with the static website contents, configuring a CloudFront distribution pointing to that bucket, creating a second bucket with a www address redirecting to the main bucket, and configuring aliases -- I opted for Amplify.
However, I wasn't entirely satisfied with this minimal effort for my new blog post. I started thinking: what project from my mental backlog could be complex enough to write about yet simple enough to implement? The result was the RSS Viewer[5]: a single-page application designed to do one thing -- display a nicely formatted RSS feed when provided with a link.
I'm not a JavaScript developer, so I aimed to keep the project as simple and minimalistic as possible, with minimal overhead. (Oh, silly, young, and naive me wasn't yet fully aware of the world of JavaScript dependency hell.)
I asked my fellow writing assistant to describe the application's structure and generate the necessary boilerplate code so I could fix it and make it work. After several attempts and about an hour of effort, a working application emerged and made its way to GitHub.
Now, let's finally deploy the application using Amplify!
The first step is to connect the application repository to the Amplify project.
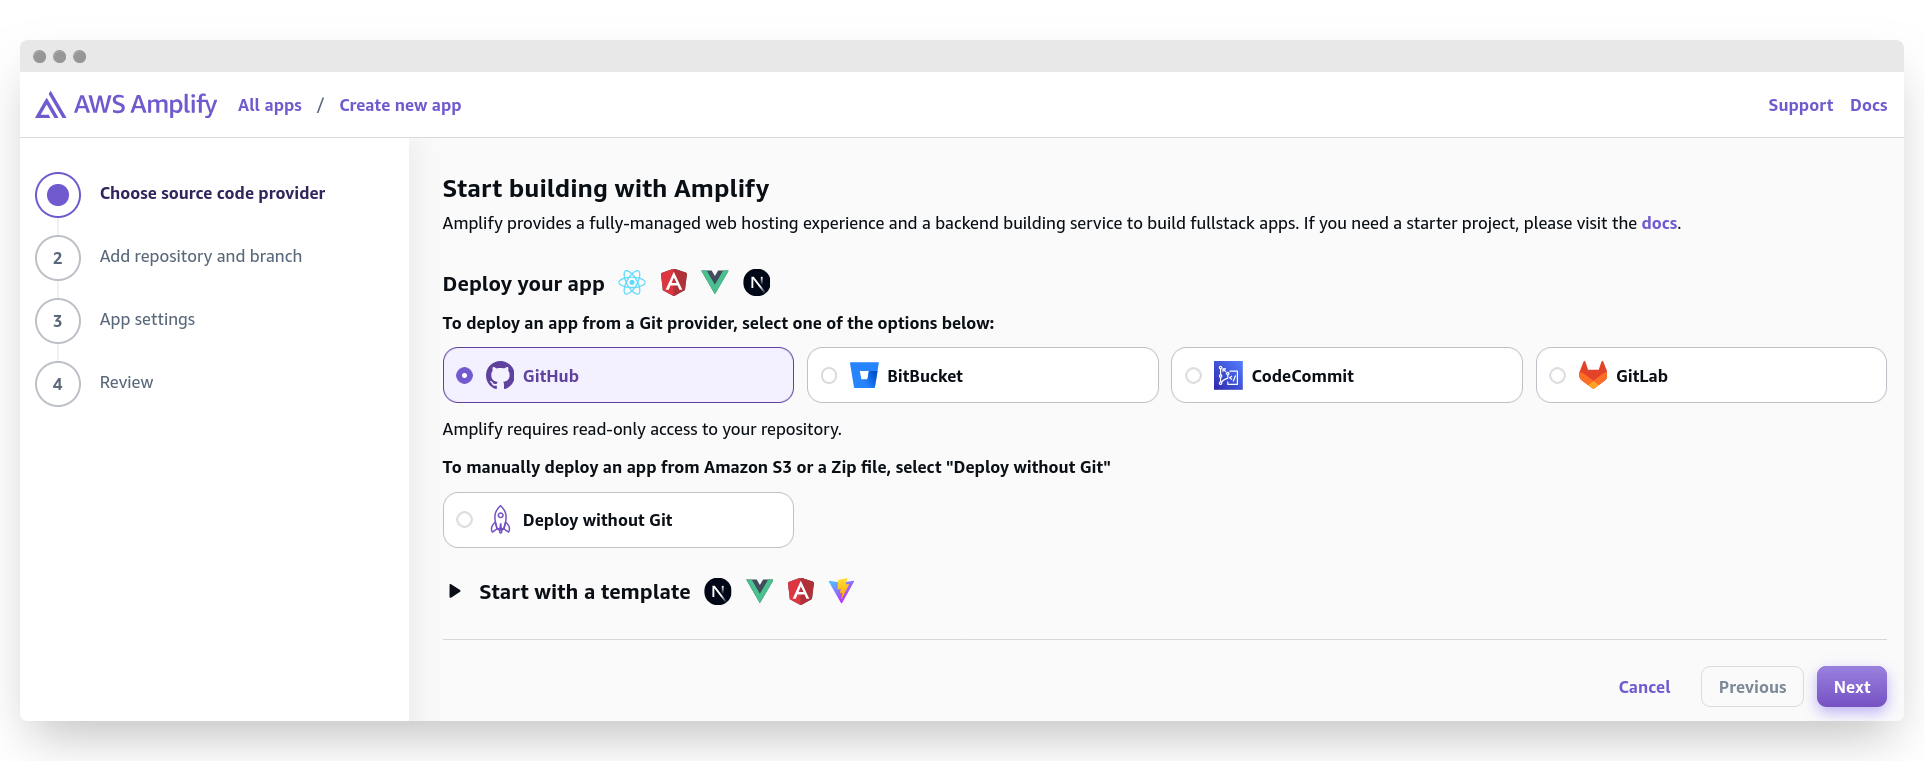
Select GitHub and click "Next". You can use any Git provider you prefer, or even an S3 bucket as the source for your code. My application is stored on GitHub, so I chose this option. You also have the option to start a new project from scratch using Next.js app router, Vue, Angular, or Vite. However, these options are beyond the scope of this article.
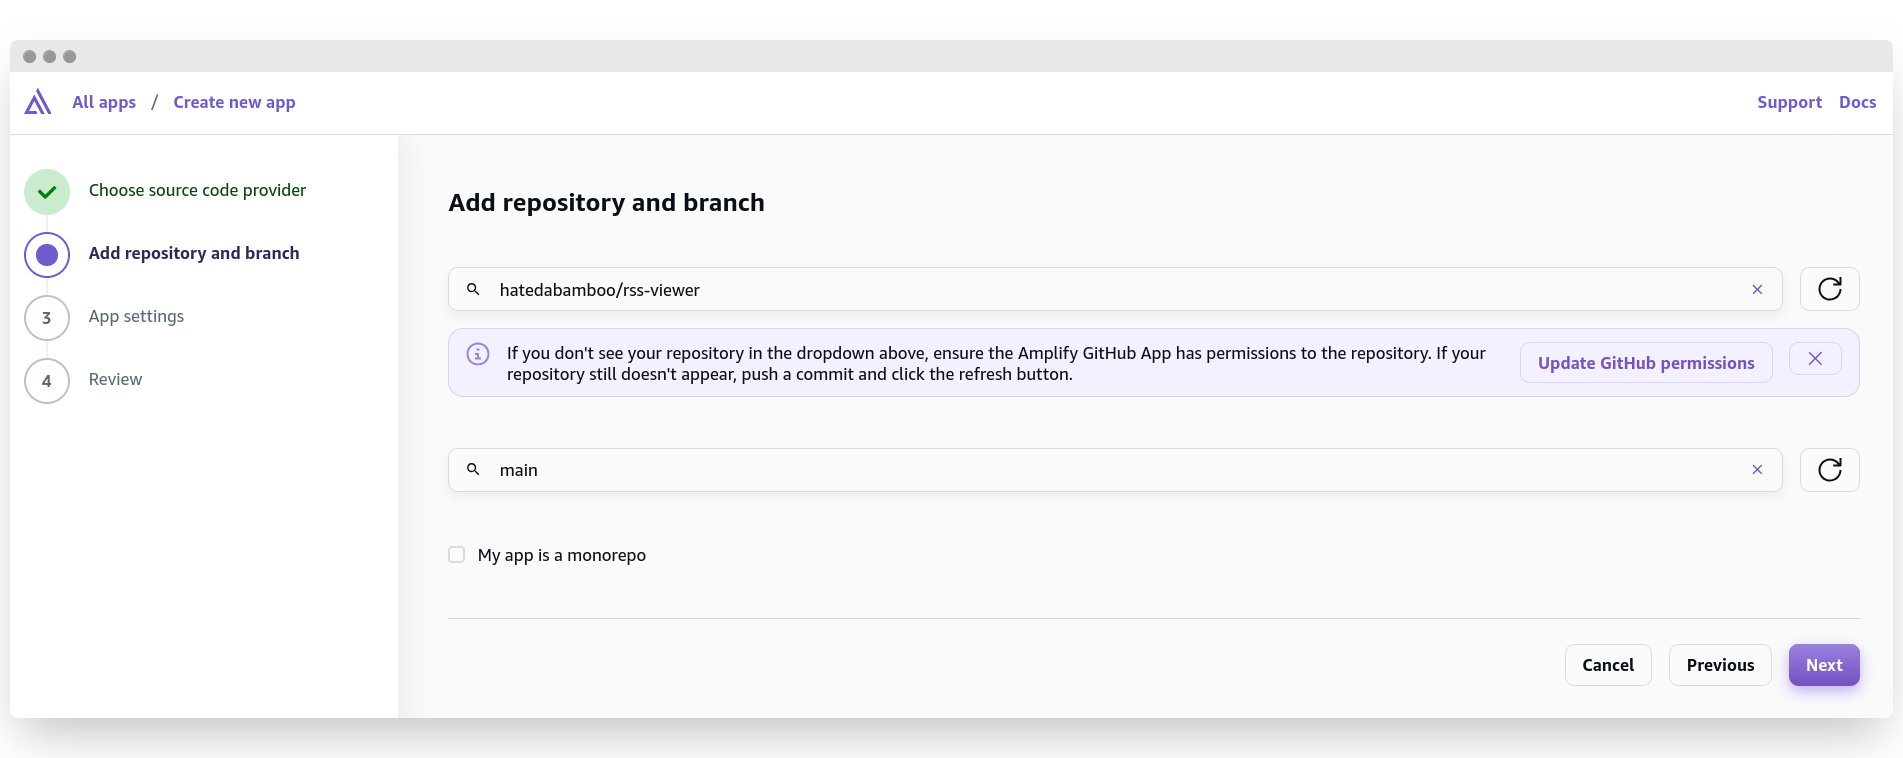
On the next screen, a window will appear requesting permission to grant Amplify access to your repository. Grant the necessary permissions and proceed to select the repository from the first window. Then, choose your main branch from the dropdown below. By default, the branch name is, well, "main".
If you're using a monorepo approach, as I do, it makes sense to check the "My app is a monorepo" box and specify the root directory of the application. For my application, the root directory is src/. After selecting all the necessary options, you're ready to proceed. Click "Next".
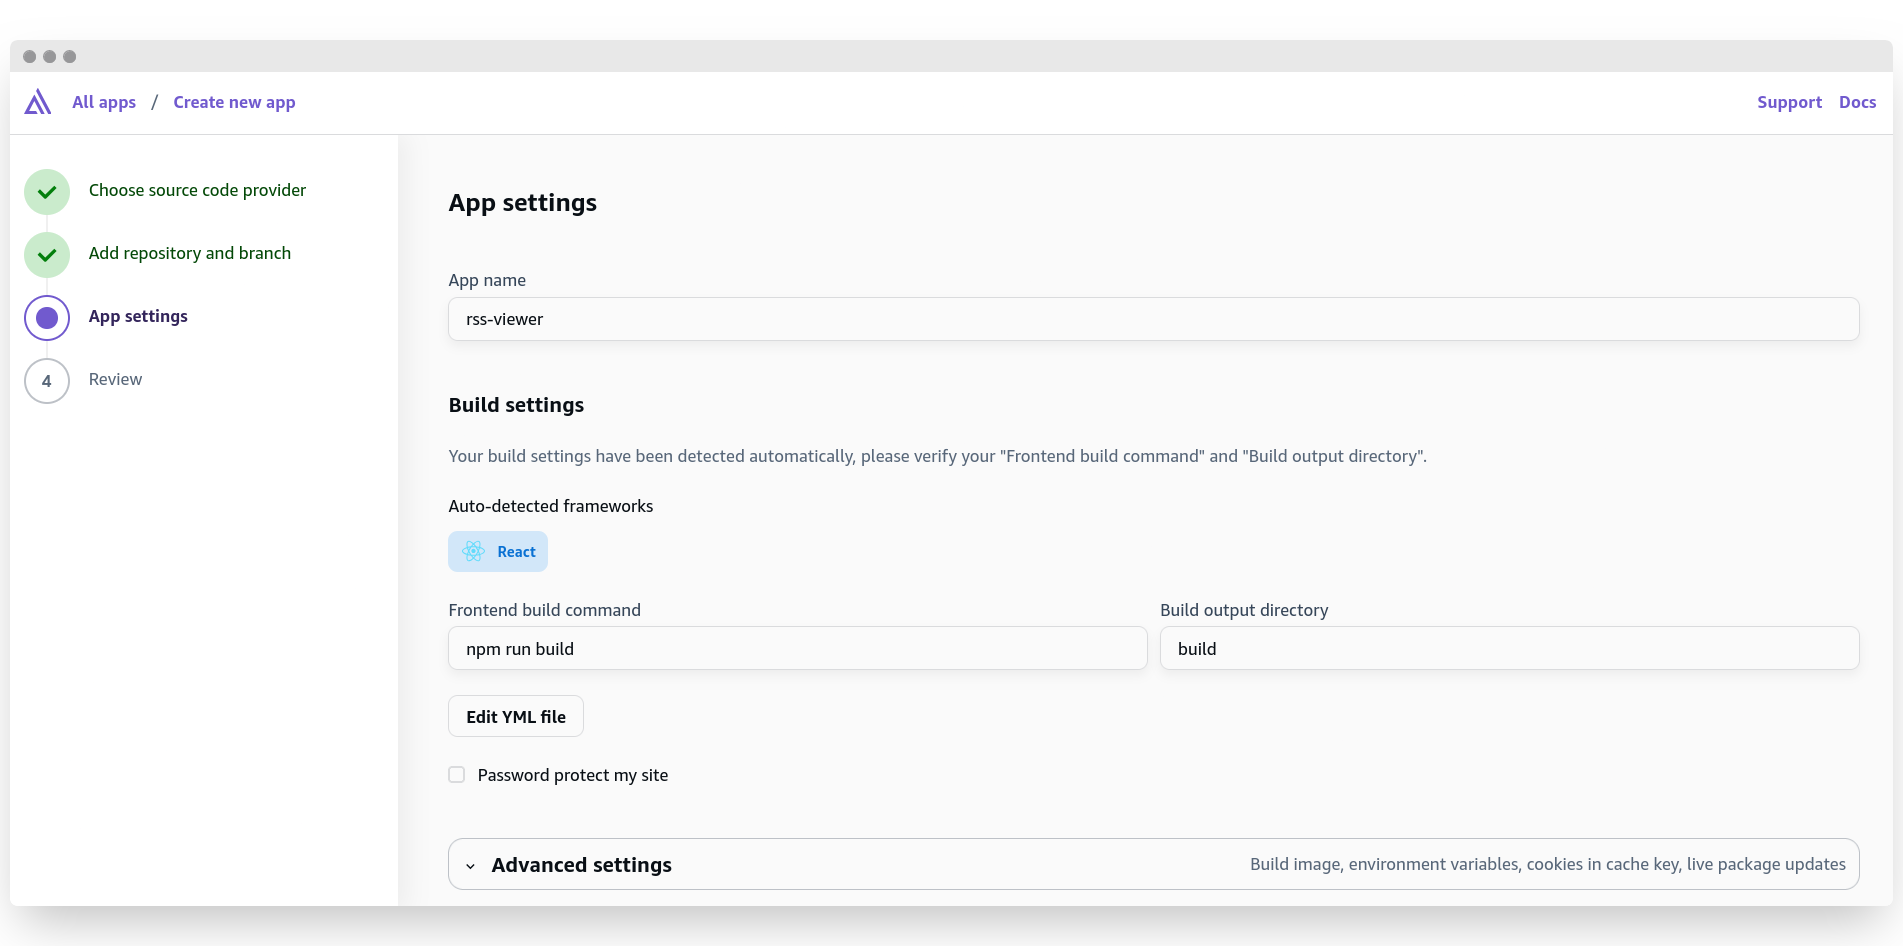
In this step, there are several configurations to make, along with some settings that are detected automatically. Amplify identifies the framework used to develop the application and suggests corresponding commands for building the code and specifying the output directory. Hey, but at least we can specify the name our our application -- that's something, right?
Interestingly, by clicking "Edit YML file", we can view the entire workflow file that will be used to build the application and configure it to our liking. It looks a lot like a GitHub Actions workflow file or a GitLab CI file.
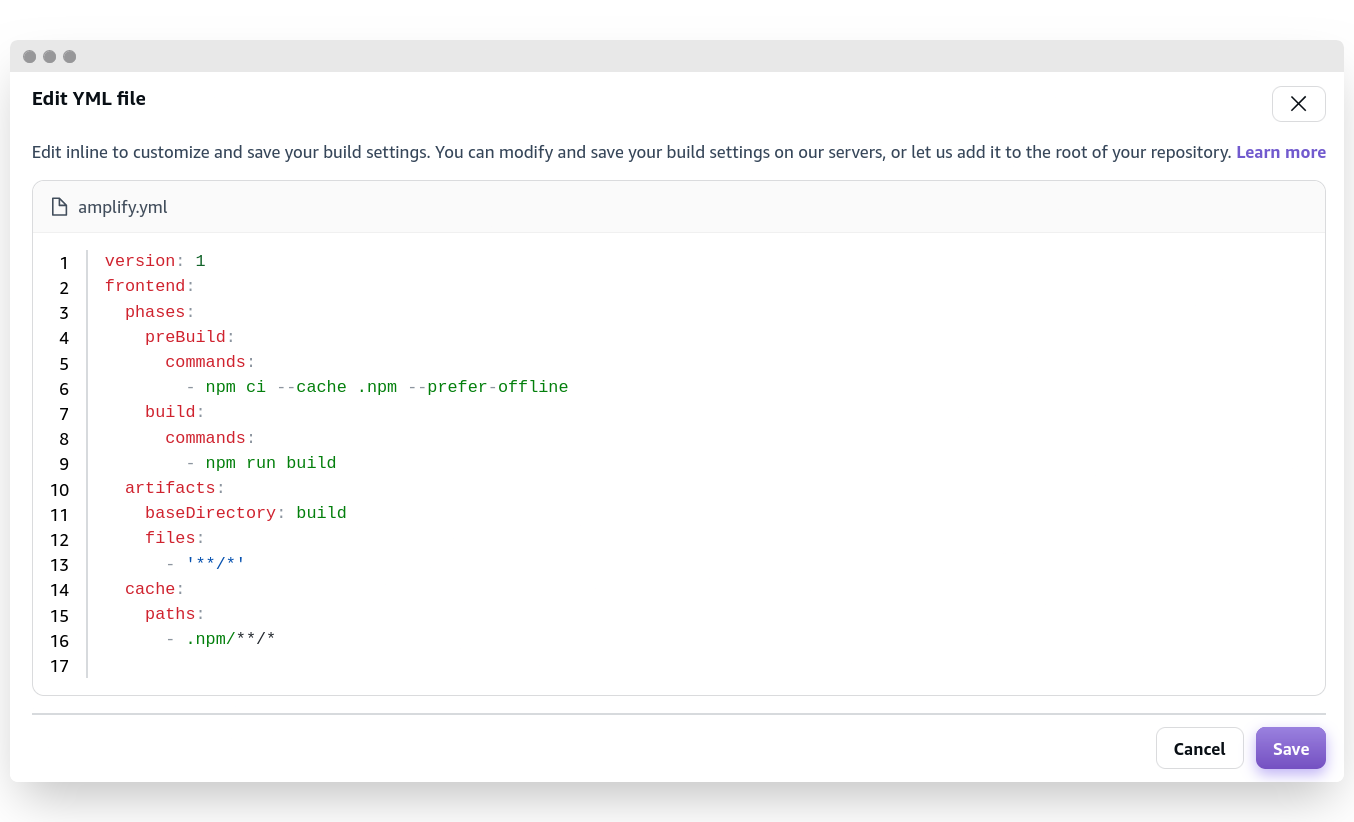
the build image, setting environment variables for sensitive information or feature flags, keeping cookies in the cache key, overriding default package versions during build time, and enabling server-side rendering application logs.
The last screen shows an overview of all the options selected previously. Review them (just to be sure) and click "Save and deploy".
After a few seconds, you'll see the main overview window of your new application. It will take several minutes to fully deploy, but once the status turns green and shows "Deployed", you'll be able to access your app using the link below.

Looks nice and easy so far!
The main menu on the left side allows you to review and adjust the options you've already configured (such as build settings, environment variables, and git repository configuration) as well as some new tricks: access control, custom domains, rewrites and redirects, secrets, and monitoring.
Let's focus on custom domains in more detail.
Configuring custom domain #
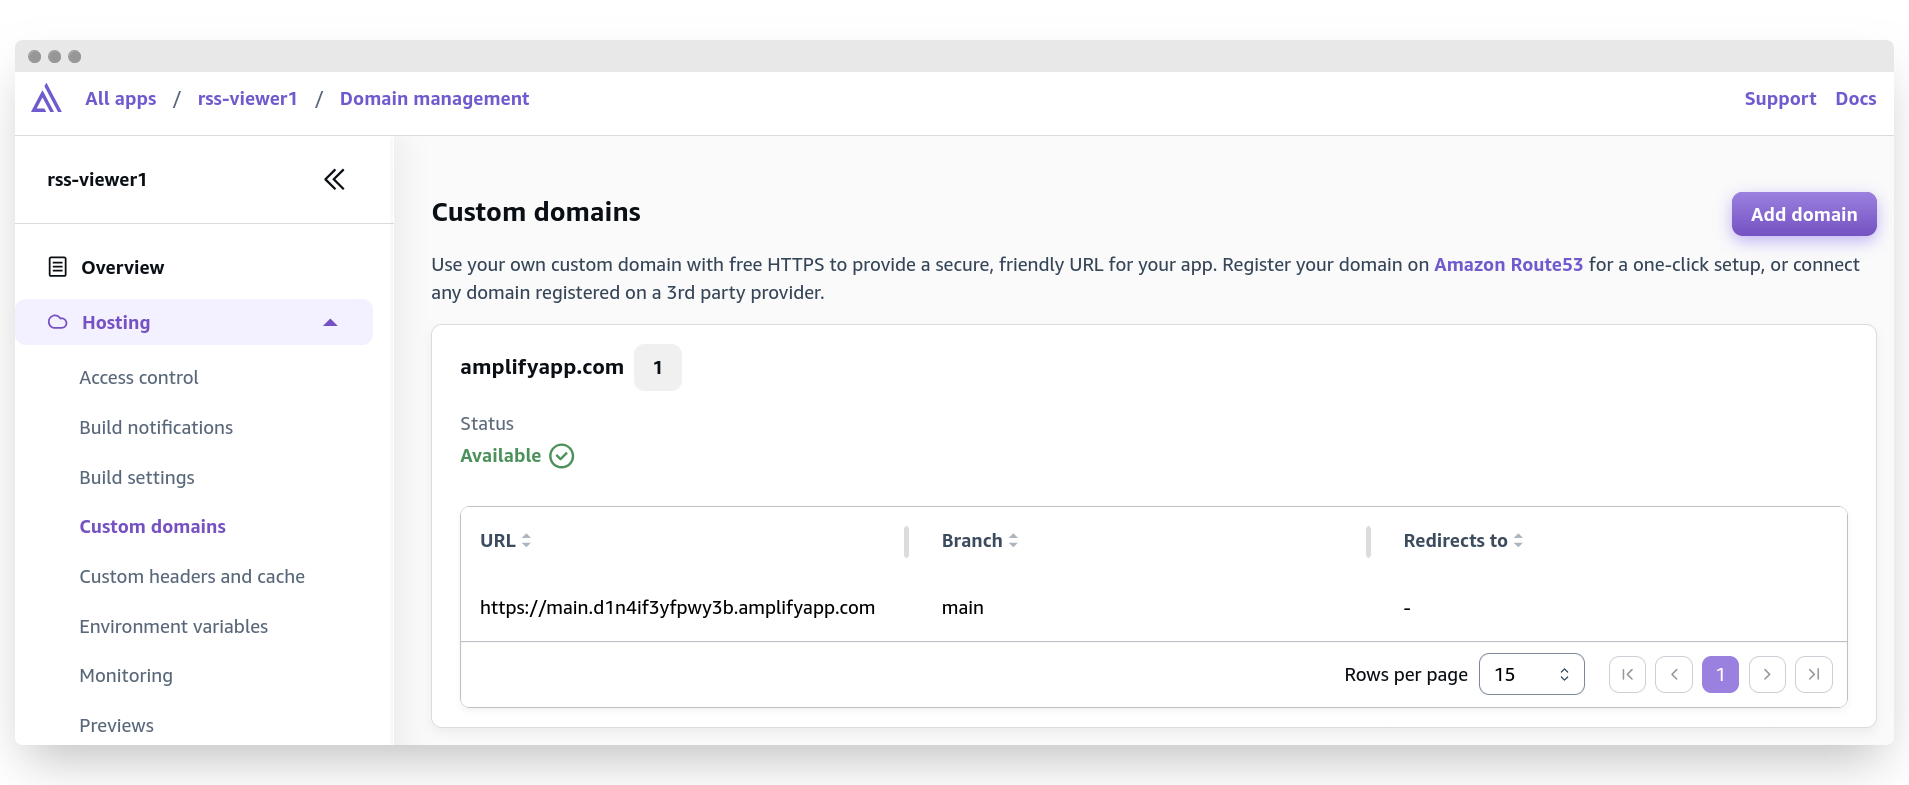
At this point, we have only one address assigned to us by Amplify. This is hardly a nice-looking link for a production-ready application -- more like a project that's still a work in progress. Notice the URL: the main part after the protocol indicates that this is the deployment of the main branch from the git repository. Very straightforward indeed! Let's add a custom domain to our application.
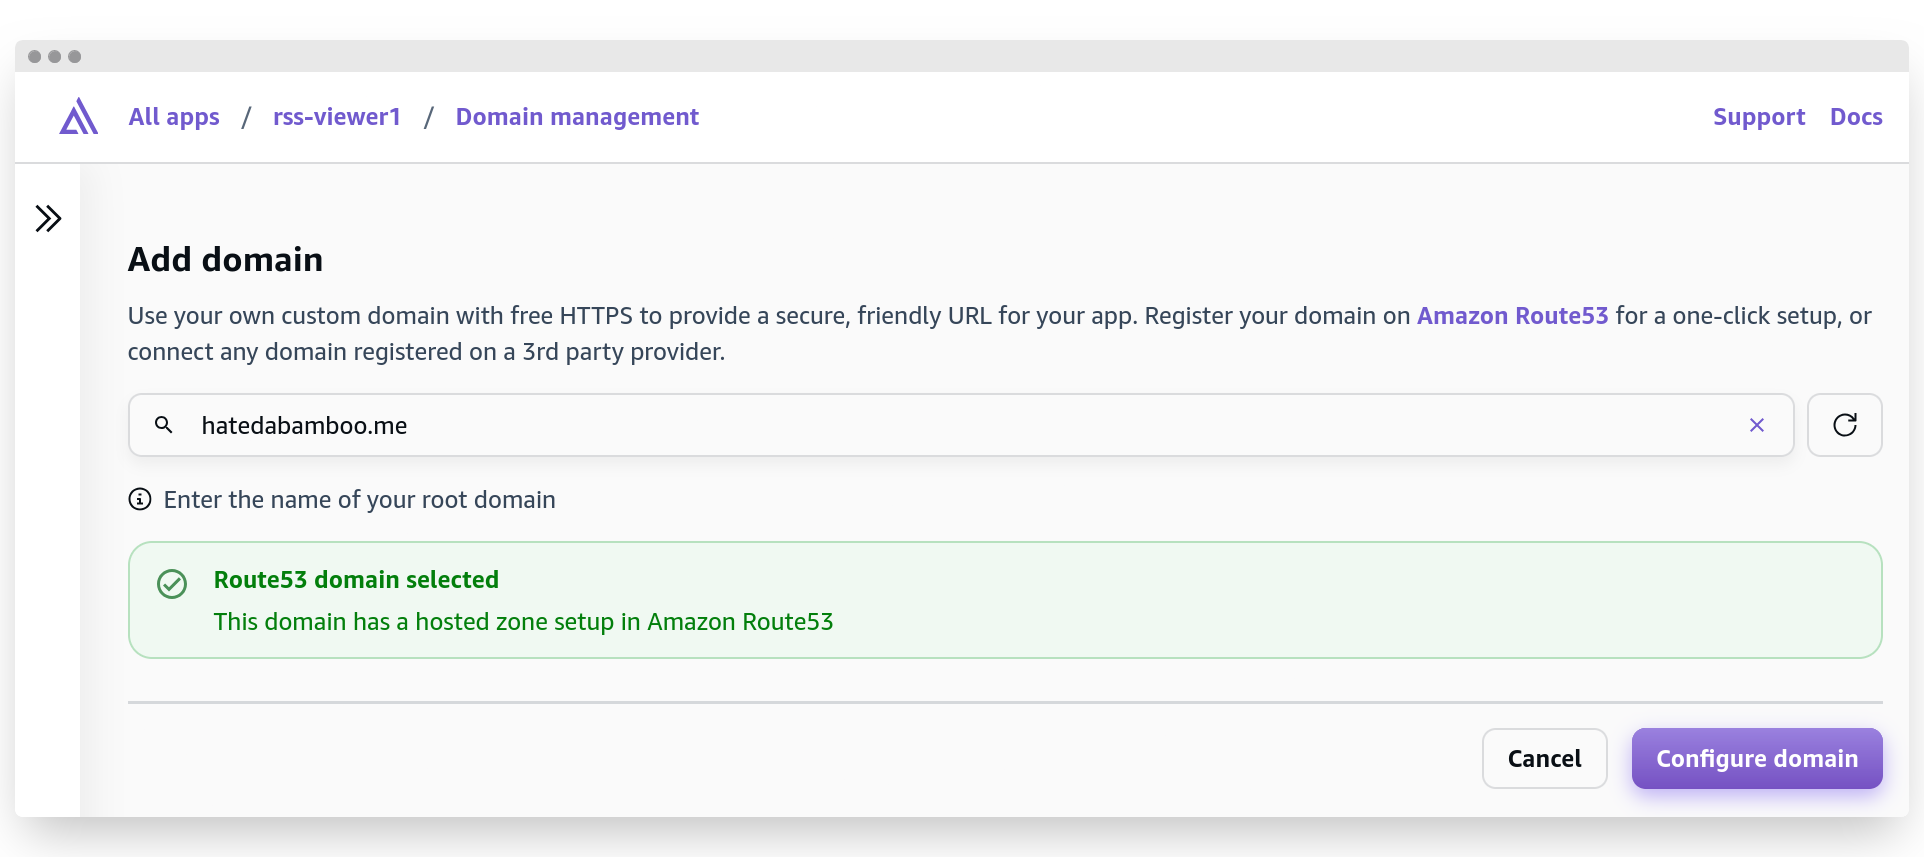
I already have a domain name registered in Route 53 (as you can see in the screenshot), so I can easily select it from the dropdown list. Click "Configure domain".
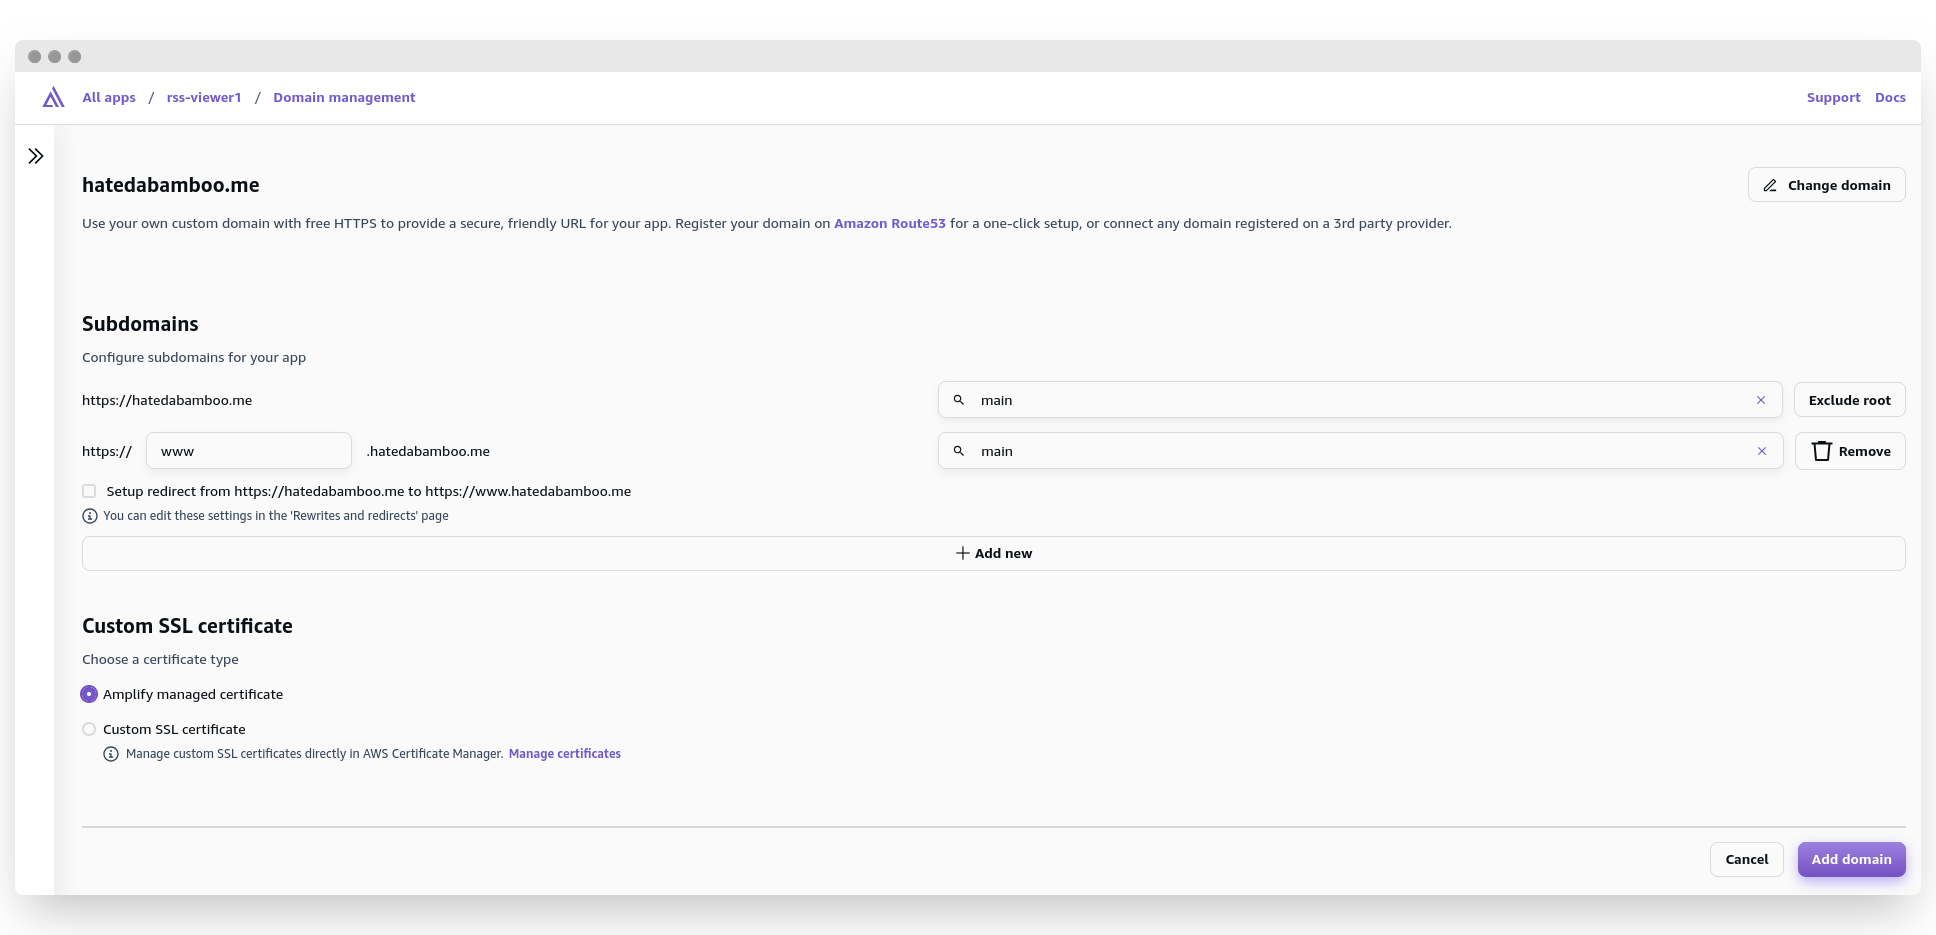
This is the page where we can configure our custom subdomains. The first line proposes deploying my application to my domain. However, since I already use this domain for my website[4:1], I will exclude the root. This leaves us with the second option. I will assign my main branch to the rss subdomain.
With the "Automatic subdomain creation" option, you can elevate your preview branching approach even further. For example, instead of main.123456abcdefg.amplifyapp.com, you can use main.yourdomain.com addresses, which is very convenient, in my opinion, if not simply easy and pretty.
If you already have a certificate issued for your domain by AWS (as I do), you can select this certificate from the dropdown menu under "Custom SSL certificate". Otherwise, Amplify will issue one for you.
If you're happy with the results, click "Save" and let the custom domain deploy.
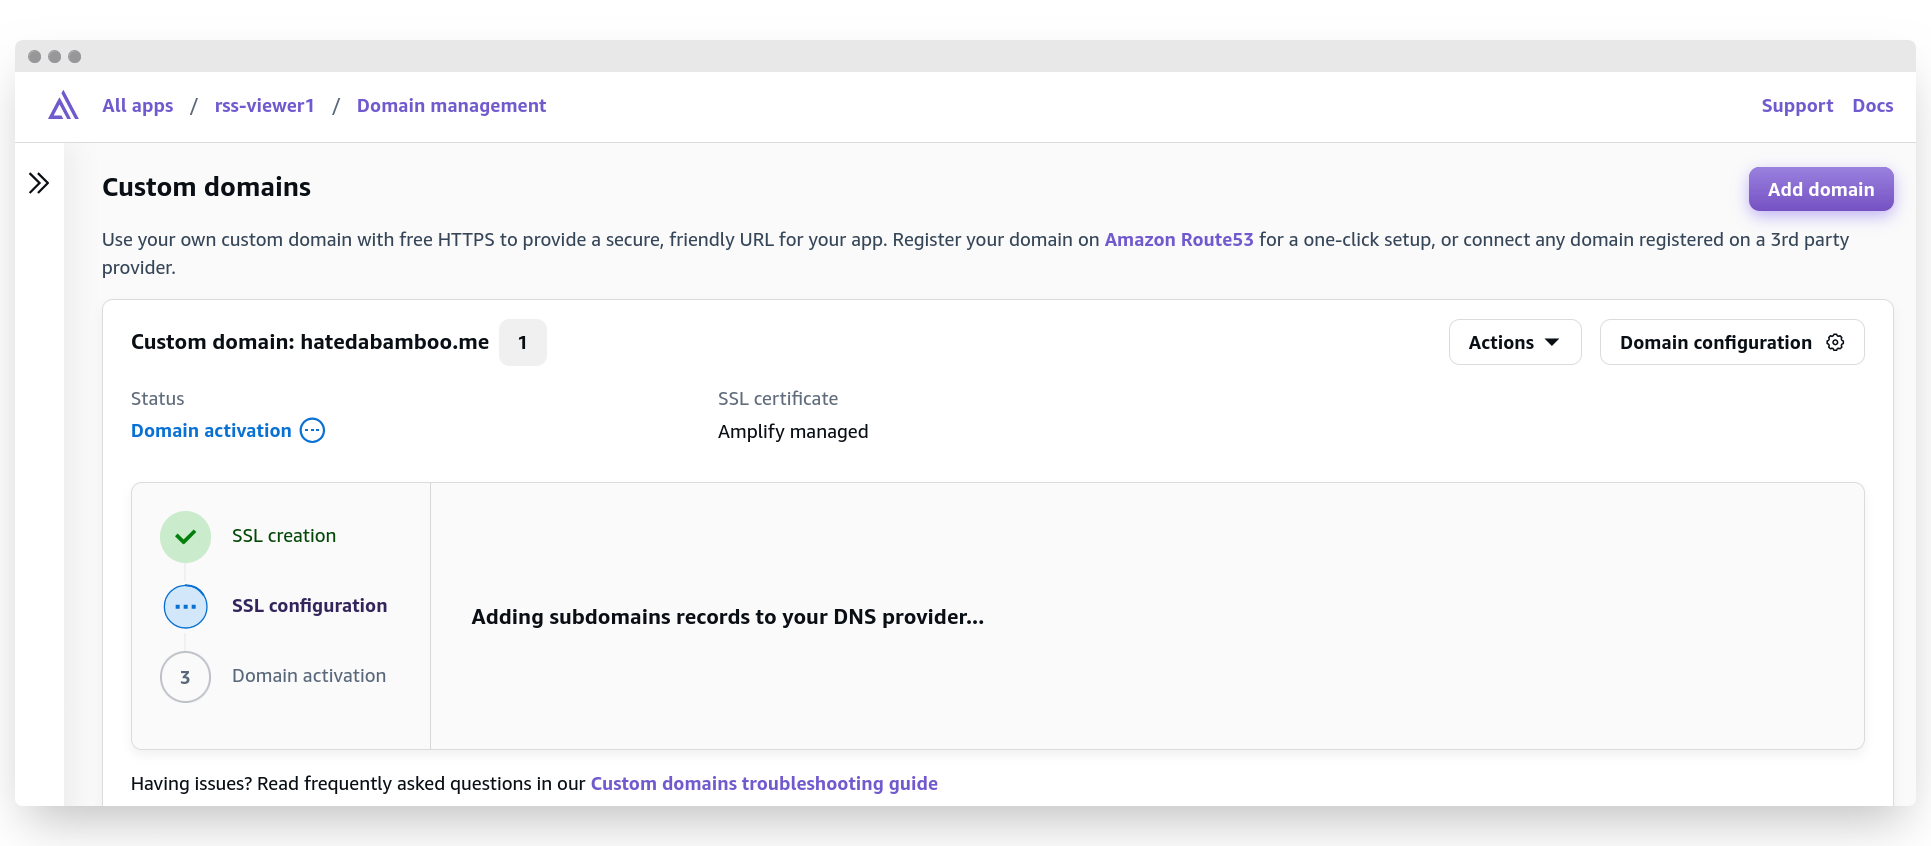
This is the most time-consuming step in the whole process, no thanks to DNS. I've seen issues with this step before, which is why AWS added a direct link to the troubleshooting guide right below this block.
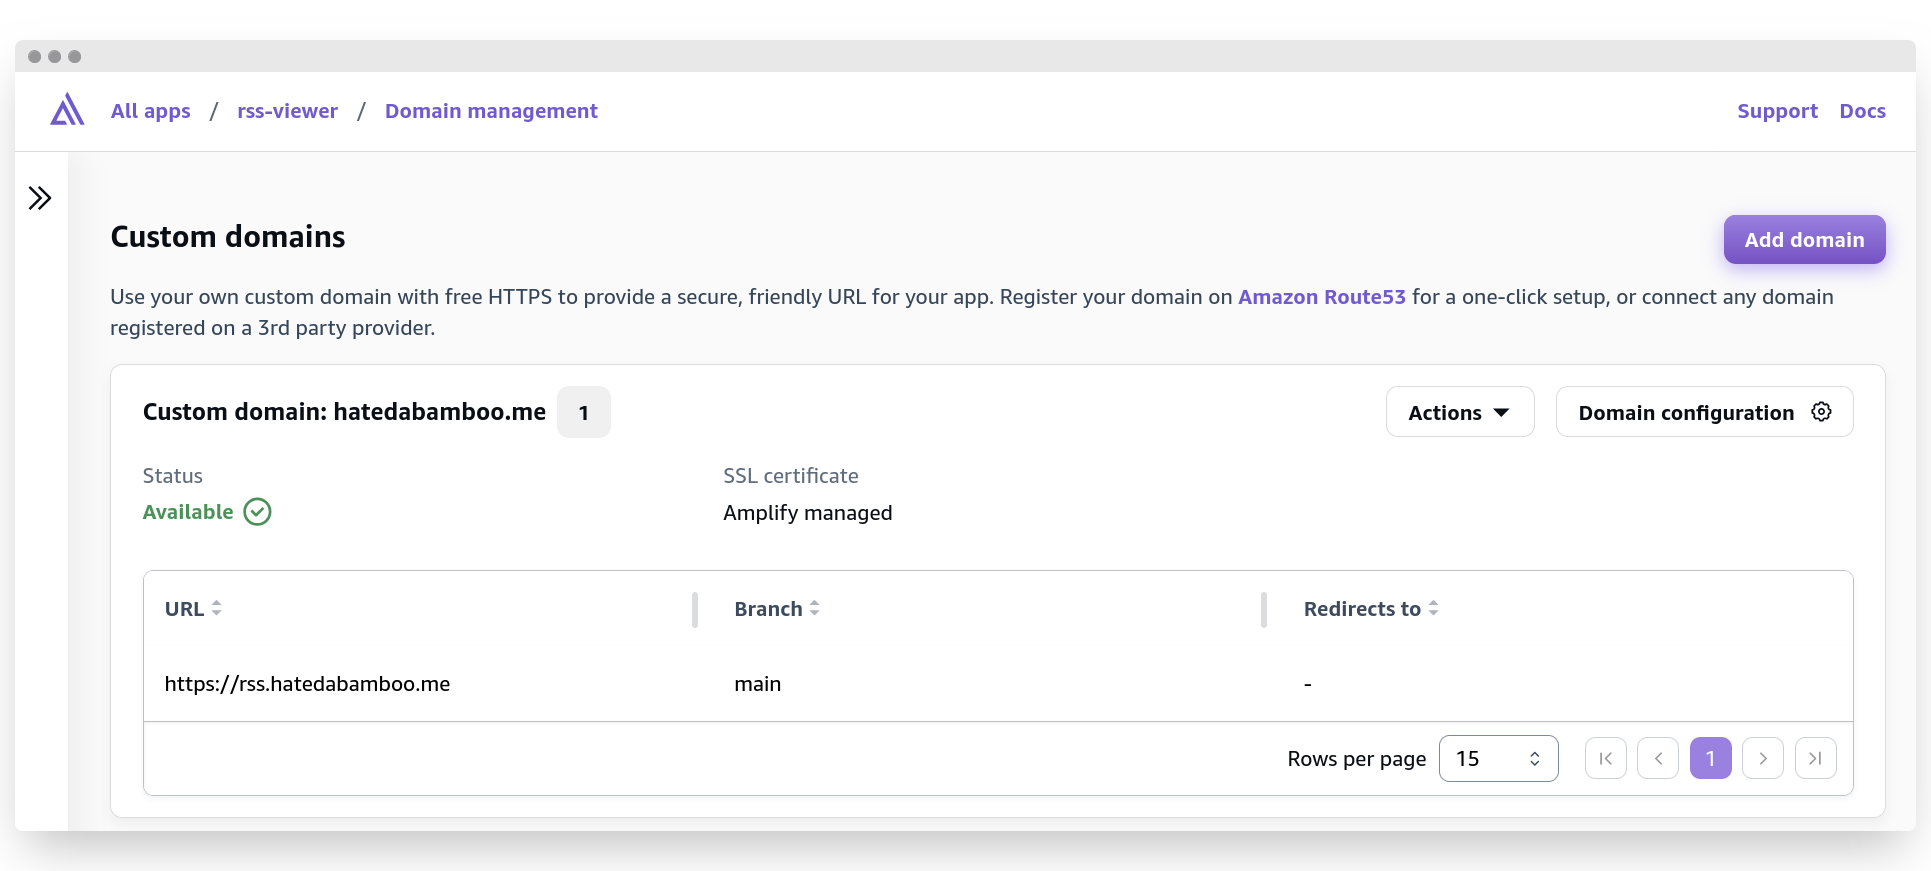
After several minutes of waiting, the new custom domain should be available, and you will be able to reach your application at the specified URL.
Conclusion #
And thus concludes the guide to deploying your own React application with the help of AWS Amplify. As you can see, the whole process is very straightforward and easy to repeat. AWS handles all the heavy lifting, and trust me as an experienced DevOps engineer: I've had my fair share of deployment configurations and setting up pipelines. It warms my heart to see that more and more people will be able to leverage the advancement of 1-click deployments, instead of spending countless hours, sweat, tears, and blood trying to figure out why the project isn't being built correctly (hello, missing backslash in multiline YAML!).
Happy developing, happy holidays, and most likely, see ya next year!
Closing remarks
As always, feel free to disagree with me, correct my mistakes and befriend me on one of the social media platforms listed below.