Advent of Sysadmin 2025
Advent season is here! And that means advent challenges as well!
After a disastrous attempt at Advent of Code last year, this year I was very happy to see that Sad Servers started an Advent challenge of their own -- Advent of Sysadmin! At last, a challenge I can (hopefully) progress further than task 3. And this means more challenges for us to tackle. The Advent will consist of 12 challenges. To keep things slightly more interesting, I will publish the solution to each task the day after it's released: for example, today, on December 2, I will solve the task from December 1, and so on. Have fun!
All tasks are available!

Auderghem: containers miscommunication #
Description
There is an nginx Docker container that listens on port 80, the purpose of which is to redirect the traffic to two other containers statichtml1 and statichtml2 but this redirection is not working. Fix the problem.
We connect to the server, and the first thing we check is the running Docker containers:
bashadmin@i-03fc55a1924a48445:~$ docker ps
CONTAINER ID   IMAGE          COMMAND                  CREATED        STATUS         PORTS                                 NAMES
89bf0e394bb9   statichtml:2   "busybox httpd -f -v…"   26 hours ago   Up 8 seconds   3000/tcp                              statichtml2
1f96c1876662   statichtml:1   "busybox httpd -f -v…"   26 hours ago   Up 8 seconds   3000/tcp                              statichtml1
7440094fc321   nginx          "/docker-entrypoint.…"   26 hours ago   Up 8 seconds   0.0.0.0:80->80/tcp, [::]:80->80/tcp   nginx
We can see that the statichtml containers are set up to serve port 3000. Let's check if we can curl them:
bashadmin@i-03fc55a1924a48445:~$ curl -v localhost/1
* Host localhost:80 was resolved.
* IPv6: ::1
* IPv4: 127.0.0.1
*   Trying [::1]:80...
* Connected to localhost (::1) port 80
* using HTTP/1.x
> GET /1 HTTP/1.1
> Host: localhost
> User-Agent: curl/8.14.1
> Accept: */*
>
* Request completely sent off
Okay, so the problem is that the nginx container can't reach the statichtml{1,2} containers. Duh. Let's see how they're configured in the web server.
bashadmin@i-03fc55a1924a48445:~$ docker exec -ti nginx cat /etc/nginx/conf.d/default.conf
    server {
        listen 80;
        location / {
            root   /usr/share/nginx/html;
            index  index.html index.htm;
        }
        location /1 {
            rewrite ^ / break;
            proxy_pass http://statichtml1.sadservers.local;
            proxy_connect_timeout   2s;
            proxy_send_timeout      2s;
            proxy_read_timeout      2s;
        }
        location /2 {
            rewrite ^ / break;
            proxy_pass http://statichtml2.sadservers.local;
            proxy_connect_timeout   2s;
            proxy_send_timeout      2s;
            proxy_read_timeout      2s;
        }
The web server is configured to connect to the backends on port 80. Let's see if we can change the default.conf.
bashadmin@i-03fc55a1924a48445:~$ docker inspect nginx | jq .[0].Mounts
[
  {
    "Type": "bind",
    "Source": "/home/admin/app/default.conf",
    "Destination": "/etc/nginx/conf.d/default.conf",
    "Mode": "",
    "RW": true,
    "Propagation": "rprivate"
  }
]
admin@i-03fc55a1924a48445:~$ vim app/default.conf
admin@i-03fc55a1924a48445:~$ docker restart nginx
nginx
admin@i-03fc55a1924a48445:~$ docker exec -ti nginx cat /etc/nginx/conf.d/default.conf | grep local
            proxy_pass http://statichtml1.sadservers.local:3000;
            proxy_pass http://statichtml2.sadservers.local:3000;
We can see that default.conf is actually mounted from the home directory of the VM we're working on, which means we can modify the file and restart the container -- which we did. Let's see if it helped:
bashadmin@i-03fc55a1924a48445:~$ curl -v localhost/1
* Host localhost:80 was resolved.
* IPv6: ::1
* IPv4: 127.0.0.1
*   Trying [::1]:80...
* Connected to localhost (::1) port 80
* using HTTP/1.x
> GET /1 HTTP/1.1
> Host: localhost
> User-Agent: curl/8.14.1
> Accept: */*
>
* Request completely sent off
^C
No, still no luck. Let's check how the containers' network is configured.
bashadmin@i-03fc55a1924a48445:~$ docker inspect nginx | jq .[0].NetworkSettings.Networks
{
  "bridge": {
...
  }
}
admin@i-03fc55a1924a48445:~$ docker inspect statichtml1 | jq .[0].NetworkSettings.Networks
{
  "static-net": {
    "IPAMConfig": {
      "IPv4Address": "172.172.0.11"
    },
...
}
Oh, so the containers are in different networks! That's a bummer, but we can fix this. As per the task, we're only allowed to restart containers. This means we can't recreate a container in a new network, so we'll have to hot-swap networks. Luckily, with bridge networks, we can do that. And since both statichtml containers share the same network, it's much more convenient to connect the nginx container to the static-net network:
bashadmin@i-03fc55a1924a48445:~$ docker network connect static-net nginx
admin@i-03fc55a1924a48445:~$ ./agent/check.sh
OK
And just like that, we've successfully finished the first task!
Marseille: Rocky Security #
Description
As the Christmas shopping season approaches, the security team has asked Mary and John to implemente more security measures. Unfortunately, this time they have broken the LAMP stack; the frontend is unable get an answer from upstream, thus they need your help again to fix it.
The application should be able to serve the content from the webserver.
Oh, the ol' reliable. I have to say, I never actually spent meaningful time with the LAMP stack (thankfully?). My go-to web server has always been nginx, database -- Postgres, and backend language -- Python and Go. Perhaps that's why my hair is so soft and shiny, and my body smells like flower blossoms. Regardless, let's see what we're dealing with.
bash[admin@i-0e0450878ee67b460 etc]$ journalctl -feu httpd
Dec 02 19:44:29 i-0e0450878ee67b460.us-east-2.compute.internal systemd[1]: Starting httpd.service - The Apache HTTP Server...
Dec 02 19:44:29 i-0e0450878ee67b460.us-east-2.compute.internal (httpd)[1009]: httpd.service: Referenced but unset environment variable evaluates to an empty string: OPTIONS
Dec 02 19:44:29 i-0e0450878ee67b460.us-east-2.compute.internal systemd[1]: Started httpd.service - The Apache HTTP Server.
Dec 02 19:44:29 i-0e0450878ee67b460.us-east-2.compute.internal httpd[1009]: Server configured, listening on: port 80
^C
[admin@i-0e0450878ee67b460 etc]$ curl localhost
<!DOCTYPE HTML PUBLIC "-//IETF//DTD HTML 2.0//EN">
<html><head>
<title>503 Service Unavailable</title>
</head><body>
<h1>Service Unavailable</h1>
<p>The server is temporarily unable to service your
request due to maintenance downtime or capacity
problems. Please try again later.</p>
</body></html>
Interesting -- we're getting a 503. That's unusual. Let's see what the logs have to tell us.
bash[admin@i-0e0450878ee67b460 etc]$ cd /var/log/httpd
bash: cd: /var/log/httpd: Permission denied
Are you cereal.
bash[admin@i-0e0450878ee67b460 etc]$ sudo su
cdcd[root@i-0e0450878ee67b460 etc]# cd /var/log/httpd
[root@i-0e0450878ee67b460 httpd]# ls -la
total 12
drwx------.  2 root root   41 Dec  2 03:38 .
drwxr-xr-x. 11 root root 4096 Dec  2 02:52 ..
-rw-r--r--.  1 root root   80 Dec  2 19:45 access_log
-rw-r--r--.  1 root root 1786 Dec  2 19:45 error_log
[root@i-0e0450878ee67b460 httpd]# cat error_log | tail -n 5
[Tue Dec 02 19:44:29.672346 2025] [suexec:notice] [pid 1009:tid 1009] AH01232: suEXEC mechanism enabled (wrapper: /usr/sbin/suexec)
[Tue Dec 02 19:44:29.701088 2025] [lbmethod_heartbeat:notice] [pid 1009:tid 1009] AH02282: No slotmem from mod_heartmonitor
[Tue Dec 02 19:44:29.703021 2025] [systemd:notice] [pid 1009:tid 1009] SELinux policy enabled; httpd running as context system_u:system_r:httpd_t:s0
[Tue Dec 02 19:44:29.718645 2025] [mpm_event:notice] [pid 1009:tid 1009] AH00489: Apache/2.4.63 (Rocky Linux) configured -- resuming normal operations
[Tue Dec 02 19:44:29.718687 2025] [core:notice] [pid 1009:tid 1009] AH00094: Command line: '/usr/sbin/httpd -D FOREGROUND'
[Tue Dec 02 19:45:05.837552 2025] [proxy:error] [pid 1038:tid 1111] (13)Permission denied: AH00957: FCGI: attempt to connect to 127.0.0.1:9001 (127.0.0.1:9001) failed
[Tue Dec 02 19:45:05.837594 2025] [proxy_fcgi:error] [pid 1038:tid 1111] [client ::1:39934] AH01079: failed to make connection to backend: 127.0.0.1
This looks like a misconfiguration -- let's double-check if we're right.
bash[root@i-0e0450878ee67b460 ~]# ss -ntupl | grep 900
tcp   LISTEN 0      4096       127.0.0.1:9000      0.0.0.0:*    users:(("php-fpm",pid=1029,fd=9),("php-fpm",pid=1028,fd=9),("php-fpm",pid=1027,fd=9),("php-fpm",pid=1026,fd=9),("php-fpm",pid=1025,fd=9),("php-fpm",pid=969,fd=7))
[root@i-0e0450878ee67b460 ~]# cd /etc/httpd/conf.d/
[root@i-0e0450878ee67b460 conf.d]# ls -la
total 24
drwxr-xr-x. 2 root root  122 Dec  2 02:52 .
drwxr-xr-x. 5 root root  105 Dec  2 02:52 ..
-rw-r--r--. 1 root root  157 Dec  2 02:52 000-default.conf
-rw-r--r--. 1 root root 2916 Aug 16 00:00 autoindex.conf
-rw-r--r--. 1 root root 1577 Apr  9  2025 php.conf
-rw-r--r--. 1 root root  400 Aug 16 00:00 README
-rw-r--r--. 1 root root 1252 Aug 16 00:00 userdir.conf
-rw-r--r--. 1 root root  653 Aug 16 00:00 welcome.conf
[root@i-0e0450878ee67b460 conf.d]# vi 000-default.conf
[root@i-0e0450878ee67b460 conf.d]# systemctl restart httpd
Yes, Apache was configured to proxy requests to 127.0.0.1:9001, but php-fpm served the backend on port 9000. I changed the port to the correct one. Unfortunately, to no avail.
bash[root@i-0e0450878ee67b460 ~]# curl localhost
<!DOCTYPE HTML PUBLIC "-//IETF//DTD HTML 2.0//EN">
<html><head>
<title>503 Service Unavailable</title>
</head><body>
<h1>Service Unavailable</h1>
<p>The server is temporarily unable to service your
request due to maintenance downtime or capacity
problems. Please try again later.</p>
</body></html>
And this is where I got stuck. Not only have I never actually administered in‑depth Apache servers with a PHP backend, I've never seen Rocky Linux, and I had basically no idea where to look or what to look for. Fifteen minutes dedicated to solving the task seemed like a mockery. I crawled through every step once again, trying to find keywords to lead me. In the httpd logs I actually found one: SELinux.
What is SELinux? It's a Security‑Enhanced Linux kernel module that often causes more trouble than help if configured improperly -- something I've encountered many times, this time included. A quick search for "selinux apache 503" showed that the default SELinux policy blocks httpd network requests, which causes exactly this error. Oh, security, you never fail to amaze me!
bash[root@i-0e0450878ee67b460 conf.d]# getsebool httpd_can_network_connect
httpd_can_network_connect --> off
And, of course, it was forbidden! Let's fix this issue.
bash[root@i-0e0450878ee67b460 conf.d]# setsebool httpd_can_network_connect 1
[root@i-0e0450878ee67b460 conf.d]# getsebool httpd_can_network_connect
httpd_can_network_connect --> on
[root@i-0e0450878ee67b460 conf.d]# curl localhost | head -1
SadServers - LAMP Stack
[root@i-0e0450878ee67b460 conf.d]# cd
[root@i-0e0450878ee67b460 ~]#
exit
[admin@i-0e0450878ee67b460 ~]$ ./agent/check.sh
OK
And this, my friends, is a successful solution to the second task!
Kortenberg: Can't touch this! #
Description
Is "All I want for Christmas is you" already everywhere?. A bit unrelated, someone messed up the permissions in this server, the admin user can't list new directories and can't write into new files. Fix the issue.
NOTE: Besides solving the problem in your current admin shell session, you need to fix it permanently, as in a new login shell for user "admin" (like the one initiated by the scenario checker) should have the problem fixed as well.
Oh boy, this is going to be one of those tasks, isn't it? Let's see what exactly we're dealing with here.
bashadmin@i-038be5ca7a3896dec:~$ ls -la
total 32
drwx------ 5 admin admin 4096 Dec  1 00:31 .
drwxr-xr-x 3 root  root  4096 Sep  7 16:29 ..
drwx------ 3 admin admin 4096 Sep  7 16:31 .ansible
-rw-r--r-- 1 admin admin  220 Jul 30 19:28 .bash_logout
-rw-r--r-- 1 admin admin 3526 Jul 30 19:28 .bashrc
-rw-r--r-- 1 admin admin  796 Dec  1 00:31 .profile
drwx------ 2 admin admin 4096 Sep  7 16:29 .ssh
-rw-r--r-- 1 admin admin    0 Sep  7 16:31 .sudo_as_admin_successful
drwxrwxrwx 2 admin admin 4096 Dec  1 00:31 agent
admin@i-038be5ca7a3896dec:~$ touch file
admin@i-038be5ca7a3896dec:~$ ls -la file
---------- 1 admin admin 0 Dec  3 21:27 file
admin@i-038be5ca7a3896dec:~$ echo >> file
bash: file: Permission denied
Interesting. So right from the get-go, the admin user creates a file with 000 permissions. This looks a whole lot like yet another obscure way to utilize one of the many Linux security features. But this time it's umask tricks. Let's check if my assumption is correct.
bashadmin@i-038be5ca7a3896dec:~$ umask
0777
Yep, this is umask all right. But where does it get set? The description was quite straightforward that the solution has to be permanent, so changing the umask mode in the current shell won't do. This means one of the shell configuration files has to be found and altered.
bashadmin@i-038be5ca7a3896dec:~$ cat .bashrc | grep umask
admin@i-038be5ca7a3896dec:~$ cat .profile | grep umask
# the default umask is set in /etc/profile; for setting the umask
# for ssh logins, install and configure the libpam-umask package.
admin@i-038be5ca7a3896dec:~$ grep umask /etc/profile
umask 777
admin@i-038be5ca7a3896dec:~$ sudo sed -i '/umask/d' /etc/profile
admin@i-038be5ca7a3896dec:~$ sudo su
root@i-038be5ca7a3896dec:/home/admin# su - admin
admin@i-038be5ca7a3896dec:~$ touch file2
admin@i-038be5ca7a3896dec:~$ ls -l file2
---------- 1 admin admin 0 Dec  3 21:28 file2
admin@i-038be5ca7a3896dec:~$ umask
0777
Dang it. I will have to be more eloquent after all.
bashadmin@i-038be5ca7a3896dec:~$
logout
root@i-038be5ca7a3896dec:/home/admin# echo 'umask 0011' >> .bashrc
root@i-038be5ca7a3896dec:/home/admin# su - admin
admin@i-038be5ca7a3896dec:~$ umask
0011
admin@i-038be5ca7a3896dec:~$ touch file3
admin@i-038be5ca7a3896dec:~$ ls -l file3
-rw-rw-rw- 1 admin admin 0 Dec  3 21:30 file3
admin@i-038be5ca7a3896dec:~$ bash agent/check.sh
OK
Oh well, good enough to solve the scenario -- good enough for me.
On a sidenote, time and time again I catch myself thinking, "Oh wow, what a variety of ways Linux can be confusing and unfriendly to the user." But then again, things happen for a reason. I wanted to complain here about the ubiquitous nature of umask and how it's so much more confusing than the good old chmod, but then I realized that they serve different purposes and aren't entirely antagonistic in nature -- they're complementary. While chmod helps keep permissions under control after a file or directory has been created, umask enforces them right from the start. Effectively, it's a safety belt for when you forget a too-permissive directory somewhere in /bin.
Woluwe: Too many images #
Description
A pipeline created a lot of Docker images locally for a web app. All these images except for one contain a typo introduced by a developer: there's an incorrect image instruction to pipe "HelloWorld" to "index.htmlz" instead of using the correct "index.html".
Find which image doesn't have the typo (and uses the correct "index.html"), tag this correct image as "prod" (rather than fixing the current prod image) and then deploy it with docker run -d --name prod -p 3000:3000 prod so it responds correctly to HTTP requests on port :3000 instead of "404 Not Found".
From the description of the task, I could immediately tell that we would have to dive deep into the Docker image's layers.
bashadmin@i-0bb15e2e2e010d1f8:~$ docker images | wc -l
103
Man, that's a lot of Docker images. And we will have to find a needle in a haystack. Easy as pie! With only a hundred images, we can simply crawl through each of them looking for the layer with the correct command. As the task description was very nice and provided us the wrong string, we can grep it out and find the image with the correct one.
bashadmin@i-0bb15e2e2e010d1f8:~$ for i in $(docker image list --format "table {{.ID}}" | grep -v IMAGE); do echo -n $i; docker history $i --no-trunc | grep HelloWorld; done | grep -v htmlz
3f8befa65f01<missing>                                                                 2 days ago    RUN |1 HW=529 /bin/sh -c echo "HelloWorld;$HW" > index.html # buildkit     15B       buildkit.dockerfile.v0
dd15126afe8d
And there we have it! In the command above, we crawled through every docker image (printing only the image ID using formatted output), printed the layers of each image (using the very helpful docker history command -- it's very powerful for reverse-engineering and vulnerability reconnaissance) and filtered out the incorrect ones. Simple as that, and it only took us several seconds.
Now we shall tag the correct image as a production image, as we're asked, and check the correctness of the solution.
bashadmin@i-0bb15e2e2e010d1f8:~$ docker image tag 3f8befa65f01 prod
admin@i-0bb15e2e2e010d1f8:~$ docker images | grep prod
prod         latest    3f8befa65f01   2 days ago    5.32MB
admin@i-0bb15e2e2e010d1f8:~$ docker history --no-trunc prod
IMAGE                                                                     CREATED       CREATED BY                                                                 SIZE      COMMENT
sha256:3f8befa65f011134767c89fa24709ffa01ef81b055b894c8a0b0f43fe37dcd34   2 days ago    RUN |1 HW=529 /bin/sh -c head -c 1m /dev/urandom > index.data # buildkit   1.05MB    buildkit.dockerfile.v0
<missing>                                                                 2 days ago    RUN |1 HW=529 /bin/sh -c echo "HelloWorld;$HW" > index.html # buildkit     15B       buildkit.dockerfile.v0
<missing>                                                                 2 days ago    ARG HW=529                                                                 0B        buildkit.dockerfile.v0
<missing>                                                                 4 weeks ago   CMD ["busybox" "httpd" "-f" "-v" "-p" "3000"]                              0B        buildkit.dockerfile.v0
<missing>                                                                 4 weeks ago   WORKDIR /home/static                                                       0B        buildkit.dockerfile.v0
<missing>                                                                 4 weeks ago   USER static                                                                0B        buildkit.dockerfile.v0
<missing>                                                                 4 weeks ago   RUN /bin/sh -c adduser -D static # buildkit                                1.66kB    buildkit.dockerfile.v0
<missing>                                                                 4 weeks ago   EXPOSE &{[{{3 0} {3 0}}] 0xc000579b40}                                     0B        buildkit.dockerfile.v0
<missing>                                                                 3 years ago   BusyBox 1.35.0 (glibc), Debian 12                                          4.27MB
admin@i-0bb15e2e2e010d1f8:~$ docker run -d --name prod -p 3000:3000 prod
ea4a1670fd7c8917e5344cd0fc095e8e674afaaa6b96a45d95b4b68e0788126c
admin@i-0bb15e2e2e010d1f8:~$ ./agent/check.sh
OK
The last two commands (before docker run and check.sh) were just to double-check that the image we found is correctly tagged and will be used to spin up the container. Way to go, my friends -- another puzzle solved!
La Rinconada: Elevating privileges #
Description
You are logged in as the user "admin" without general "sudo" privileges.
The system administrator has granted you limited "sudo" access; this was intended to allow you to read log files.
Your mission is to find a way to exploit this limited sudo permission to gain a full root shell and read the secret file at /root/secret.txt
Copy the content of /root/secret.txt into the /home/admin/solution.txt file, for example: cat /root/secret.txt > /home/admin/solution.txt (the "admin" user must be able to read the file).
Oooh, hacking, I love that! (And it absolutely has nothing to do with the fact that I'm currently watching Mr. Robot.)
To start: we're dealing with limited sudo access to log files. Let's see what exactly is meant by that:
bashadmin@i-0adfc7a1f5cd64cfb:/var/log$ sudo -l
Matching Defaults entries for admin on i-0adfc7a1f5cd64cfb:
    env_reset, mail_badpass, secure_path=/usr/local/sbin\:/usr/local/bin\:/usr/sbin\:/usr/bin\:/sbin\:/bin, use_pty

User admin may run the following commands on i-0adfc7a1f5cd64cfb:
    (ALL : ALL) ALL
    (ALL) NOPASSWD: /sbin/shutdown
    (root) NOPASSWD: /usr/bin/less /var/log/*
The last line tells us that we can execute the /usr/bin/less command on any file in the /var/log directory with sudo and we won't be prompted for a password. Nice! That means we'll be able to use a famously flawed ability to spawn shells inside the privileged less command.
bashadmin@i-0adfc7a1f5cd64cfb:~$ cd /var/log
admin@i-0adfc7a1f5cd64cfb:/var/log$ ls -l
total 508
lrwxrwxrwx  1 root root                39 Aug 14 04:26 README -> ../../usr/share/doc/systemd/README.logs
-rw-r--r--  1 root root               960 Sep  7 16:34 alternatives.log
drwxr-xr-x  2 root root              4096 Sep  7 16:35 apt
-rw-rw----  1 root utmp                 0 Aug 14 04:25 btmp
-rw-r-----  1 root adm              13952 Dec  5 17:47 cloud-init-output.log
-rw-r-----  1 root adm             405750 Dec  5 17:47 cloud-init.log
-rw-r--r--  1 root root             31307 Sep  7 16:35 dpkg.log
drwxr-sr-x+ 3 root systemd-journal   4096 Sep  7 16:29 journal
-rw-rw-r--  1 root utmp            292292 Dec  4 21:39 lastlog
drwx------  2 root root              4096 Aug 14 04:26 private
drwxr-xr-x  3 root root              4096 Aug 14 04:26 runit
drwxr-x---  2 root adm               4096 Sep  7 16:29 unattended-upgrades
-rw-rw-r--  1 root utmp             23808 Dec  5 17:47 wtmp
admin@i-0adfc7a1f5cd64cfb:/var/log$ sudo less alternatives.log
[sudo] password for admin:
sudo: a password is required
It wouldn't be as fun otherwise, would it?
bashadmin@i-0adfc7a1f5cd64cfb:/var/log$ sudo /usr/bin/less /var/log/alternatives.log
root@i-0adfc7a1f5cd64cfb:/var/log# id
uid=0(root) gid=0(root) groups=0(root)
Great, we did it! We're in! Now for the easiest part of the task.
bashroot@i-0adfc7a1f5cd64cfb:/var/log# cat /root/secret.txt
Sudo_Esc@pe_S3cret!
root@i-0adfc7a1f5cd64cfb:/var/log# cat /root/secret.txt >> /home/admin/solution.txt
root@i-0adfc7a1f5cd64cfb:/var/log#
exit
!done  (press RETURN)
admin@i-0adfc7a1f5cd64cfb:/var/log$ cd
admin@i-0adfc7a1f5cd64cfb:~$ ./agent/check.sh
OK
And that is the most complex task so far done!
Out of the proposed 15 minutes to solve this task, I spent almost an hour trying to figure out what to do. The wording of the task made me think that somehow I could use sudo with certain commands without a password. Turns out, I was absolutely correct in the assumption, but not in the way I approached the challenge. I was trying to execute, with sudo -n (-n for non-interactive), every command in /bin, /usr/bin, and /usr/local/bin. What I should have done instead was read sudo --help to find the -l key, which shows the list of actions that are allowed for the current user with and without a password. Every day we learn something new! The rest of the task was slightly simpler. Figuring out what to do with less and conditional root access was on the first page of search results for "less privilege escalation." And the rest was just a technicality.
Hamburg: Find the AWS EC2 volume #
Description
We have a lot of AWS EBS volumes, the description of which we have save to a file with: aws ec2 describe-volumes > aws-volumes.json.
One of the volumes contains important data and we need to identify which volume (its ID), but we only remember these characteristics: gp3, created before 31/09/2025 , Size < 64 , Iops < 1500, Throughput > 300.
Find the correct volume and put its "InstanceId" into the ~/mysolution file, e.g.: echo "vol-00000000000000000" > ~/mysolution
Wow, I think this is one of the rare tasks where we actually get to play with AWS (instead of relying on it to host the tasks). Let's start with a quick overview of how many volumes we actually have.
bashadmin@i-00af238f258a599de:~$ aws ec2 describe-volumes > aws-volumes.json
bash: aws-volumes.json: Permission denied
admin@i-00af238f258a599de:~$ aws
bash: aws: command not found
admin@i-00af238f258a599de:~$ ls -l
total 812
drwxrwxrwx 2 admin admin   4096 Dec  5 23:13 agent
-rwxr-xr-x 1 root  root  769417 Dec  4 20:19 aws-volumes.json
-rw-rw-r-- 1 admin admin  56361 Dec  5 23:13 aws-volumes.tar.gz
Huh? That's new. Not only are we denied writing to the file (it already exists), we don't even have awscli! Oh bother, looks like we will have to crawl through the already prepared JSON with jq.
bashadmin@i-00af238f258a599de:~$ wc -l aws-volumes.json
22377 aws-volumes.json
This is going to be fun.
bashadmin@i-00af238f258a599de:~$ cat aws-volumes.json | jq -r .Volumes[].VolumeId | wc -l
1000
Just a thousand volumes! Easy-peasy.
All right, let's go step by step. First, we should figure out the fields we have in our possession.
bashadmin@i-00af238f258a599de:~$ cat aws-volumes.json | jq '.Volumes[0]'
{
  "AvailabilityZoneId": "use2-az1",
  "Iops": 1000,
  "VolumeType": "io1",
  "MultiAttachEnabled": false,
  "Throughput": 250,
  "Operator": {
    "Managed": false
  },
  "VolumeId": "vol-c037761d6f9b4c7cb",
  "Size": 8,
  "SnapshotId": "snap-9110dc1676d545dbb",
  "AvailabilityZone": "us-east-2c",
  "State": "available",
  "CreateTime": "2025-11-17T04:16:18.004823Z",
  "Attachments": [],
  "Encrypted": true
}
That's a lot of variables we can work with. Next step -- we have to compile a proper search string to find the exact data we're looking for. jq has a very powerful data manipulation mechanism which allows it to function effectively as a database query language[1].
Since the whole aws-volumes.json file is one huge list, we will start by querying all elements in it (.Volumes[]) and then select only elements meeting certain conditions: specific volume type, specific IOPS, throughput and size, and certain creation date. In the last step, we will select from all the results only the ID of the instance the volume is attached to (.Attachments[0].InstanceId).
bashadmin@i-00af238f258a599de:~$ cat aws-volumes.json | jq -r '.Volumes[] | select(.VolumeType == "gp3" and .Size < 64 and .Iops < 1500 and .Throughput > 300 and .Attachments[].State == "attached" and .CreateTime < "2025-09-31") | .Attachments[0].InstanceId'
i-371822c092b2470da
admin@i-00af238f258a599de:~$ echo i-371822c092b2470da > mysolution
admin@i-00af238f258a599de:~$ ./agent/check.sh
OK
Looks complicated? Effectively, the string above is equivalent to the following SQL query:
sqlSELECT instance_id
FROM aws_volumes
WHERE volume_type = 'gp3'
AND size < 64
AND iops < 1500
AND throughput > 300
AND attached = true
AND create_time < '2025-09-31'
jq is awesome; I really like its simplicity and powerful functionality. I definitely would have solved this task faster than 29 minutes if I had read the description correctly the first time and hadn't tried to force the Volume ID into the solution, wondering why it wasn't working.
Annapurna: High privileges #
Description
You are logged in as the user admin.
You have been tasked with auditing the admin user privileges in this server; "admin" should not have sudo (root) access.
Exploit this server so you as the admin user can read the file /root/secret.txt
Save the content of /root/secret.txt to the file /home/admin/mysolution.txt , for example: echo "secret" > ~/mysolution.txt
From the looks of it, this task seems to be similar to the one we had before. Let's see if that is true.
bashadmin@i-05b3bee998a4a6d6c:~$ sudo -l
Matching Defaults entries for admin on i-05b3bee998a4a6d6c:
    env_reset, mail_badpass, secure_path=/usr/local/sbin\:/usr/local/bin\:/usr/sbin\:/usr/bin\:/sbin\:/bin, use_pty

User admin may run the following commands on i-05b3bee998a4a6d6c:
    (ALL : ALL) ALL
    (ALL) NOPASSWD: /sbin/shutdown
Ah, not quite. This time we actually don't have any superuser permissions. But let's see what we do have.
bashadmin@i-05b3bee998a4a6d6c:~$ id
uid=1000(admin) gid=1000(admin) groups=1000(admin),4(adm),20(dialout),24(cdrom),25(floppy),27(sudo),29(audio),30(dip),44(video),46(plugdev),989(docker)
admin@i-05b3bee998a4a6d6c:~$ docker ps -a
CONTAINER ID   IMAGE     COMMAND   CREATED   STATUS    PORTS     NAMES
admin@i-05b3bee998a4a6d6c:~$ docker images
REPOSITORY   TAG       IMAGE ID       CREATED      SIZE
alpine       latest    7acffee03fe8   4 days ago   8.44MB
Oh, this time we have a docker image! And alpine of all things! This might possibly be the lead to the solution of the task. To confirm the suspicion, let's check whether we can mount the filesystem root to the container.
bashadmin@i-05b3bee998a4a6d6c:~$ docker run -it -v /:/host/ alpine chroot /host/ bash
root@6d7650a3aef7:/# ls -l
total 3145788
lrwxrwxrwx   1 root root          7 May 12  2025 bin -> usr/bin
drwxr-xr-x   4 root root       4096 Aug 14 04:28 boot
drwxr-xr-x  14 root root       3000 Dec  8 08:06 dev
drwxr-xr-x  73 root root       4096 Dec  8 08:06 etc
drwxr-xr-x   3 root root       4096 Sep  7 16:29 home
lrwxrwxrwx   1 root root          7 May 12  2025 lib -> usr/lib
lrwxrwxrwx   1 root root          9 May 12  2025 lib64 -> usr/lib64
drwx------   2 root root      16384 Aug 14 04:24 lost+found
drwxr-xr-x   2 root root       4096 Aug 14 04:25 media
drwxr-xr-x   2 root root       4096 Aug 14 04:25 mnt
drwxr-xr-x   3 root root       4096 Sep  7 16:35 opt
dr-xr-xr-x 148 root root          0 Dec  8 08:06 proc
drwx------   3 root root       4096 Dec  7 14:49 root
drwxr-xr-x  24 root root        600 Dec  8 08:06 run
lrwxrwxrwx   1 root root          8 May 12  2025 sbin -> usr/sbin
drwxr-xr-x   2 root root       4096 Aug 14 04:25 srv
-rw-------   1 root root 3221225472 Sep  7 16:32 swapfile
dr-xr-xr-x  13 root root          0 Dec  8 08:07 sys
drwxrwxrwt   8 root root        160 Dec  8 08:18 tmp
drwxr-xr-x  12 root root       4096 Aug 14 04:25 usr
drwxr-xr-x  11 root root       4096 Sep  7 16:29 var
And indeed we can. This turned out to be much simpler than I expected. The rest should be an easy road.
bashroot@6d7650a3aef7:/# cd /root/
root@6d7650a3aef7:~# ls -l
total 4
-rw------- 1 root root 21 Dec  7 14:49 mysecret.txt
root@6d7650a3aef7:~# cat mysecret.txt  > /home/admin/mysolution.txt
root@6d7650a3aef7:~# bash /home/admin/agent/check.sh
OK
And yet another task is solved! See you in the next one!
Podgorica: Docker to Podman migration #
Description
You have been tasked with migrating this future web server from using Docker (which uses a daemon) to rootless Podman.
There is already an Nginx Podman image on the server, and your objective is to manage the container created from it using systemd, so the it starts automatically on reboot and continues running unless explicity stopped (the same behaviour expected from a Docker-managed container).
Create a systemd service named container-nginx.service that manages the Podman Nginx container. Enable and start this service.
NOTES: Although a quadlet file solution should be valid, the check script is still not accounting for it.
There is no need to reboot the VM, although if you want you could reboot it from the command line with /sbin/shutdown -r now and refresh or reopen the web console.
This was a task and a half, I can tell you after spending almost 2 hours on it. Why so much? Simply because I didn't have any previous experience with Podman in general and rootless Podman in particular. Turns out, it's a very interesting program with very useful functionality -- if you know how to cook. I didn't, so I had to learn on the fly (as one usually does). After figuring out the correct approach, the task was relatively simple.
So what are we dealing with? For starters, we have a rootless Podman, whatever that means, and, presumably, a leftover Docker image somewhere.
bashadmin@i-0e74c8fd8e2c2f638:~$ podman
Failed to obtain podman configuration: lstat /run/user/1000: no such file or directory
This does not spark joy. When in doubt -- read the check.sh script!
bashadmin@i-0e74c8fd8e2c2f638:~$ cat agent/check.sh
#!/usr/bin/bash
# DO NOT MODIFY THIS FILE ("Check My Solution" will fail)

export XDG_RUNTIME_DIR=/run/user/1000
export DBUS_SESSION_BUS_ADDRESS=unix:path=$XDG_RUNTIME_DIR/bus

systemctl --user is-active container-nginx.service 2>/dev/null | grep -vq '^active$' && { echo -n "NO"; exit ; }
systemctl --user is-enabled container-nginx.service 2>/dev/null | grep -vq '^enabled$' && { echo -n "NO"; exit ; }
curl -s localhost:8888 2>/dev/null | grep -Eo "Welcome to nginx" >/dev/null 2>&1 || { echo -n "NO"; exit ; }
systemctl --user stop container-nginx.service 2>/dev/null
curl -s localhost:8888 2>/dev/null >/dev/null 2>&1 && { echo -n "NO"; exit ; }
systemctl --user start container-nginx.service 2>/dev/null
for i in {1..100}; do curl -s localhost:8888 2>/dev/null | grep -Eo "Welcome to nginx" >/dev/null 2>&1 && { echo -n "OK"; exit ; } ; done
echo -n "NO"
Okay, good. Something we can start with -- for example, setting shell variables.
bashadmin@i-0e74c8fd8e2c2f638:~$ export XDG_RUNTIME_DIR=/run/user/1000
admin@i-0e74c8fd8e2c2f638:~$ export DBUS_SESSION_BUS_ADDRESS=unix:path=$XDG_RUNTIME_DIR/bus
admin@i-0e74c8fd8e2c2f638:~$ podman
Failed to obtain podman configuration: lstat /run/user/1000: no such file or directory
Hmm, same error. What if we create the missing directory?
bashadmin@i-0e74c8fd8e2c2f638:~$ mkdir -p /run/user/1000
mkdir: cannot create directory ‘/run/user/1000': Permission denied # because of course it is
admin@i-0e74c8fd8e2c2f638:~$ sudo !!
sudo mkdir -p /run/user/1000
admin@i-0e74c8fd8e2c2f638:~$ podman ps
Failed to obtain podman configuration: mkdir /run/user/1000/libpod: permission denied
Apparently, creating the missing directory for XDG_RUNTIME is not enough; it also has to be owned by our current user, admin.
bashadmin@i-0e74c8fd8e2c2f638:~$ sudo chown -R admin:admin /run/user/1000
admin@i-0e74c8fd8e2c2f638:~$ podman ps
WARN[0000] The cgroupv2 manager is set to systemd but there is no systemd user session available
WARN[0000] For using systemd, you may need to log in using a user session
WARN[0000] Alternatively, you can enable lingering with: `loginctl enable-linger 1000` (possibly as root)
WARN[0000] Falling back to --cgroup-manager=cgroupfs
CONTAINER ID  IMAGE       COMMAND     CREATED     STATUS      PORTS       NAMES
WARN[0000] Failed to add pause process to systemd sandbox cgroup: dial unix /run/user/1000/bus: connect: no such file or directory
Oh wow, that sure is progress! At least now we can see the output of the (expectedly) empty Podman. Perhaps we can remediate the rest of the warning messages with the command it generously printed for us?
bashadmin@i-0e74c8fd8e2c2f638:~$ loginctl enable-linger 1000
admin@i-0e74c8fd8e2c2f638:~$ podman ps
CONTAINER ID  IMAGE       COMMAND     CREATED     STATUS      PORTS       NAMES
Success! Now, let's see if we can actually view the user scope.
bashadmin@i-0e74c8fd8e2c2f638:~$ systemctl --user status
● i-0e74c8fd8e2c2f638
    State: running
    Units: 107 loaded (incl. loaded aliases)
     Jobs: 0 queued
   Failed: 0 units
    Since: Tue 2025-12-09 14:56:47 UTC; 8s ago
  systemd: 257.7-1
  Tainted: unmerged-bin
   CGroup: /user.slice/user-1000.slice/user@1000.service
           ├─init.scope
           │ ├─1502 /usr/lib/systemd/systemd --user
           │ └─1505 "(sd-pam)"
           ├─session.slice
           │ └─dbus.service
           │   └─1551 /usr/bin/dbus-daemon --session --address=systemd: --nofork --nopidfile --systemd-activation --syslog-only
           └─user.slice
             └─podman-pause-7e0f233a.scope
               └─1539 catatonit -P
And indeed we can! All right, this is starting to look doable after all!
bashadmin@i-0e74c8fd8e2c2f638:~$ podman image ls
REPOSITORY               TAG         IMAGE ID      CREATED      SIZE
docker.io/library/nginx  latest      60adc2e137e7  3 weeks ago  155 MB
admin@i-0e74c8fd8e2c2f638:~$ podman run -d -p 8888:80 --name nginx nginx:latest
d0e0e0aa1e1c406e1f1b964fb6e7a4dd04c1fb1240bf065067af28cd17571a8c
admin@i-0e74c8fd8e2c2f638:~$ podman generate systemd --name nginx --files --new

DEPRECATED command:
It is recommended to use Quadlets for running containers and pods under systemd.

Please refer to podman-systemd.unit(5) for details.
/home/admin/container-nginx.service
admin@i-0e74c8fd8e2c2f638:~$ mkdir -p .config/systemd/user
admin@i-0e74c8fd8e2c2f638:~$ mv container-nginx.service .config/systemd/user/
admin@i-0e74c8fd8e2c2f638:~$ systemctl --user daemon-reload
admin@i-0e74c8fd8e2c2f638:~$ systemctl --user enable container-nginx.service
Created symlink '/home/admin/.config/systemd/user/default.target.wants/container-nginx.service' → '/home/admin/.config/systemd/user/container-nginx.service'.
admin@i-0e74c8fd8e2c2f638:~$ systemctl --user start container-nginx.service
admin@i-0e74c8fd8e2c2f638:~$ ./agent/check.sh
OK
And we did it!
Before succumbing to a well-earned rest, let's review what was happening in the last block of shell commands.
After checking the available images for our current user in Podman (turns out there is actually nginx), we spun up the image to create a systemd unit file for it in the next step. Surprisingly, Podman does have a command to generate a systemd unit file, even though it's deprecated, but still usable. The task explicitly asks us to do so. Then I spent several minutes searching for where user-scoped unit files should reside, created the directory, and moved the unit file there. After making the daemon reread the necessary directories, I enabled the service and marked it to start upon boot. And that was that!
Torino: Optimize grande Docker image #
Description
A Torino Node.js application is located in the ~torino-app directory.
You can run it directly with: nohup node app.js > app.log 2>&1 &. You can also verify that it works by running: curl localhost:3000
There is already a torino Docker image built with the Dockerfile in ~torino-app, but the resulting image size is 916 MB.
Your task is to optimize the Docker image size:
1. Build a new Docker image for the Torino application, also called torino:latest but with a total size under 122 MB
2. Create and run a container using this optimized image.
NOTE: You can only use the existing Docker images in the server.
To build a Node application you need to COPY in your Dockerfile, besides the app.js , the package.json* files and without Internet access, the node_modules directory, since you cannot RUN npm install.
At last, a task I'm both happy to tackle and have experience with (I even wrote an article on the topic). Let's get right into it.
bashadmin@i-0f2d8e60f47f72874:~$ docker ps
CONTAINER ID   IMAGE     COMMAND   CREATED   STATUS    PORTS     NAMES
admin@i-0f2d8e60f47f72874:~$ ls -l
total 40
drwxr-xr-x 2 admin root  4096 Dec  9 03:04 agent
drwxr-xr-x 3 admin admin 4096 Dec  9 03:04 torino-app
admin@i-0f2d8e60f47f72874:~$ cd torino-app/
admin@i-0f2d8e60f47f72874:~/torino-app$ ls -la
total 52
drwxr-xr-x  3 admin admin  4096 Dec  9 03:04 .
drwx------  7 admin admin  4096 Dec  9 03:04 ..
-rw-r--r--  1 admin admin   116 Dec  9 03:04 Dockerfile
-rw-r--r--  1 admin admin   248 Dec  9 03:03 app.js
drwxrwxr-x 67 admin admin  4096 Dec  9 03:04 node_modules
-rw-rw-r--  1 admin admin 27134 Dec  9 03:04 package-lock.json
-rw-rw-r--  1 admin admin   271 Dec  9 03:04 package.json
admin@i-0f2d8e60f47f72874:~/torino-app$ cat Dockerfile
FROM node:16

WORKDIR /app

COPY package.json .
COPY app.js .

RUN npm install

EXPOSE 3000

CMD ["node", "app.js"]
admin@i-0f2d8e60f47f72874:~/torino-app$ docker images
REPOSITORY   TAG         IMAGE ID       CREATED        SIZE
torino       latest      79ab8632f03a   38 hours ago   916MB
node         16          1ddc7e4055fd   2 years ago    909MB
node         16-alpine   2573171e0124   2 years ago    118MB
All right, I see what you did there. Let's dissect the premises.
Of course, the ginormous image is basic node:16. And just like the rifle on the wall, node:16-alpine seems like the intended image for us to use. And use it we will!
bashadmin@i-0f2d8e60f47f72874:~/torino-app$ vim Dockerfile
admin@i-0f2d8e60f47f72874:~/torino-app$ cat Dockerfile
FROM node:16-alpine

WORKDIR /app

COPY package.json .
COPY app.js .
COPY node_modules/ node_modules/

EXPOSE 3000
admin@i-0f2d8e60f47f72874:~/torino-app$ docker build -f  Dockerfile -t torino:latest .
[+] Building 0.5s (10/10) FINISHED                                                                                           docker:default
 => [internal] load build definition from Dockerfile                                                                                   0.0s
 => => transferring dockerfile: 178B                                                                                                   0.0s
 => [internal] load metadata for docker.io/library/node:16-alpine                                                                      0.0s
 => [internal] load .dockerignore                                                                                                      0.0s
 => => transferring context: 2B                                                                                                        0.0s
 => [1/5] FROM docker.io/library/node:16-alpine                                                                                        0.0s
 => [internal] load build context                                                                                                      0.1s
 => => transferring context: 38.90kB                                                                                                   0.1s
 => CACHED [2/5] WORKDIR /app                                                                                                          0.0s
 => CACHED [3/5] COPY package.json .                                                                                                   0.0s
 => CACHED [4/5] COPY app.js .                                                                                                         0.0s
 => [5/5] COPY node_modules/ node_modules/                                                                                             0.2s
 => exporting to image                                                                                                                 0.1s
 => => exporting layers                                                                                                                0.1s
 => => writing image sha256:054461c812cb04f2d5e9f5b13aea1506f8b624b37c94ffec15c3a6a4080cdf0f                                           0.0s
 => => naming to docker.io/library/torino:latest                                                                                       0.0s
admin@i-0f2d8e60f47f72874:~/torino-app$ docker images
REPOSITORY   TAG         IMAGE ID       CREATED         SIZE
torino       latest      054461c812cb   6 seconds ago   120MB
<none>       <none>      49b7f8f19109   2 minutes ago   120MB
<none>       <none>      79ab8632f03a   38 hours ago    916MB
node         16          1ddc7e4055fd   2 years ago     909MB
node         16-alpine   2573171e0124   2 years ago     118MB
There are differences between the new image and the old one. First, we use the alpine image instead of the default one -- it lacks the (sometimes) unnecessary bloat. Second, we omit running npm install and installing the whole internet, and instead just copy the node_modules directory into the final image. Surprisingly, the directory weighs only 4 MB.
120 MB -- much better, and just the right amount to fit the task requirements! Let's wrap up the task.
bashadmin@i-0f2d8e60f47f72874:~/torino-app$ docker run -p 3000:3000 -di torino:latest
84f5f5a55d0e898235aa868ecde113319383bfb20f9ce463c0fe531fa481078f
admin@i-0f2d8e60f47f72874:~/torino-app$ docker ps
CONTAINER ID   IMAGE           COMMAND                  CREATED         STATUS         PORTS                                         NAMES
84f5f5a55d0e   torino:latest   "docker-entrypoint.s…"   5 seconds ago   Up 4 seconds   0.0.0.0:3000->3000/tcp, [::]:3000->3000/tcp   eager_meitner
admin@i-0f2d8e60f47f72874:~/torino-app$ docker logs eager_meitner
Server running on port 3000
admin@i-0f2d8e60f47f72874:~/torino-app$ ../agent/check.sh
OK
Success! Congratulations on another successfully completed task! If you're interested in the most popular ways to minimize a Docker image, I suggest you check out my article.
Socorro, NM: Optimize Podman image #
Description
The podman image localhost/prod:latest contains a static website.
Initially the image size is 261 MB and contains 100 layers.
Your task:
1. Optimize the image localhost/prod:latest so that its size is less than 200 MB, using the same tag.
2. Run a container named "check" from the optimized image: podman run -d --name check -p 8888:80 localhost/prod:latest so that curl localhost:8888 returns 100 lines.
This is a weird task. I feel like I missed something, because:
- It felt too artificial for an actual viable problem (100 lines of random text? Really?)
- It was too easy to solve[2].
But anyway, let's see what we're dealing with today.
bashadmin@i-0d2c5500082a69a52:~$ ls -l
total 255120
drwxrwxrwx 2 admin admin      4096 Dec 10 00:04 agent
-rwxrwxr-x 1 admin admin      1120 Dec 10 00:02 generate.sh
-rw-rw-r-- 1 admin admin 261227520 Dec 10 00:04 prod.tar
admin@i-0d2c5500082a69a52:~$ cat generate.sh
#!/usr/bin/env bash

set -euo pipefail

LAYERS="${1:-100}"

IMAGE_NAME="${2:-prod}"

# Base image
BASE_IMAGE="docker.io/library/nginx:latest"

echo "Creating image '${IMAGE_NAME}' with ${LAYERS} layers using base image '${BASE_IMAGE}'"

# Create temporary build context
BUILD_DIR="$(mktemp -d)"
trap 'rm -rf "${BUILD_DIR}"' EXIT

CONTAINERFILE="${BUILD_DIR}/Containerfile"

# Start Containerfile with a base image
cat > "${CONTAINERFILE}" <<EOF
FROM ${BASE_IMAGE}

# First layer: create a 100 MB file
RUN dd if=/dev/zero of=/usr/share/nginx/html/index.html bs=1M count=100
EOF

echo "RUN echo 'this is layer 1' > /usr/share/nginx/html/index.html" >> "${CONTAINERFILE}"

# Add remaining RUN instructions
for ((i=2; i<=LAYERS; i++)); do
  echo "RUN echo 'this is layer ${i}' >> /usr/share/nginx/html/index.html" >> "${CONTAINERFILE}"
done

echo "Generated Containerfile at ${CONTAINERFILE}"
echo "First few lines:"
head -n 10 "${CONTAINERFILE}"
echo "..."
tail -n 5 "${CONTAINERFILE}"

# Build the image
echo
echo "Building image with podman..."
podman build -t "${IMAGE_NAME}" "${BUILD_DIR}"

echo
echo "Build complete."
Hold on, what? Why are we presented with a script that already builds an image? I mean, thank you, task, but what's the point of the whole endeavour otherwise? Oh well. So we're dealing with useless text in a static "website" image. And on top of it, the file is prepended with 100 MB of zeroes. Woah, so cool. Let's reduce the amount.
bashadmin@i-0d2c5500082a69a52:~$ vim generate.sh
admin@i-0d2c5500082a69a52:~$ cat generate.sh
#!/usr/bin/env bash

set -euo pipefail

LAYERS="${1:-100}"

IMAGE_NAME="${2:-prod}"

# Base image
BASE_IMAGE="docker.io/library/nginx:latest"

echo "Creating image '${IMAGE_NAME}' with ${LAYERS} layers using base image '${BASE_IMAGE}'"

# Create temporary build context
BUILD_DIR="$(mktemp -d)"
trap 'rm -rf "${BUILD_DIR}"' EXIT

CONTAINERFILE="${BUILD_DIR}/Containerfile"

# Start Containerfile with a base image
cat > "${CONTAINERFILE}" <<EOF
FROM ${BASE_IMAGE}

# First layer: create a 10 MB file
RUN dd if=/dev/zero of=/usr/share/nginx/html/index.html bs=100K count=100
EOF

echo "RUN echo 'this is layer 1' > /usr/share/nginx/html/index.html" >> "${CONTAINERFILE}"

# Add remaining RUN instructions
for ((i=2; i<=LAYERS; i++)); do
  echo "RUN echo 'this is layer ${i}' >> /usr/share/nginx/html/index.html" >> "${CONTAINERFILE}"
done

echo "Generated Containerfile at ${CONTAINERFILE}"
echo "First few lines:"
head -n 10 "${CONTAINERFILE}"
echo "..."
tail -n 5 "${CONTAINERFILE}"

# Build the image
echo
echo "Building image with podman..."
podman build -t "${IMAGE_NAME}" "${BUILD_DIR}"

echo
echo "Build complete."
admin@i-0d2c5500082a69a52:~$ bash generate.sh
Creating image 'prod' with 100 layers using base image 'docker.io/library/nginx:latest'
Generated Containerfile at /tmp/tmp.Dka8t10Wd7/Containerfile
First few lines:
FROM docker.io/library/nginx:latest

# First layer: create a 10 MB file
RUN dd if=/dev/zero of=/usr/share/nginx/html/index.html bs=100K count=100
RUN echo 'this is layer 1' > /usr/share/nginx/html/index.html
RUN echo 'this is layer 2' >> /usr/share/nginx/html/index.html
RUN echo 'this is layer 3' >> /usr/share/nginx/html/index.html
RUN echo 'this is layer 4' >> /usr/share/nginx/html/index.html
RUN echo 'this is layer 5' >> /usr/share/nginx/html/index.html
RUN echo 'this is layer 6' >> /usr/share/nginx/html/index.html
...
RUN echo 'this is layer 96' >> /usr/share/nginx/html/index.html
RUN echo 'this is layer 97' >> /usr/share/nginx/html/index.html
RUN echo 'this is layer 98' >> /usr/share/nginx/html/index.html
RUN echo 'this is layer 99' >> /usr/share/nginx/html/index.html
RUN echo 'this is layer 100' >> /usr/share/nginx/html/index.html

Building image with podman...
STEP 1/102: FROM docker.io/library/nginx:latest
STEP 2/102: RUN dd if=/dev/zero of=/usr/share/nginx/html/index.html bs=100K count=100
100+0 records in
100+0 records out
10240000 bytes (10 MB, 9.8 MiB) copied, 0.018266 s, 561 MB/s
--> e23880a95ef2
STEP 3/102: RUN echo 'this is layer 1' > /usr/share/nginx/html/index.html
...
STEP 102/102: RUN echo 'this is layer 100' >> /usr/share/nginx/html/index.html
COMMIT prod
--> f00dee0d48d2
Successfully tagged localhost/prod:latest
f00dee0d48d2a5932a01172a4d56d06dde38cddd08e040aac361e4d412986a9a

Build complete.
admin@i-0d2c5500082a69a52:~$ podman images
REPOSITORY               TAG         IMAGE ID      CREATED         SIZE
localhost/prod           latest      f00dee0d48d2  18 seconds ago  166 MB
<none>                   <none>      22dc6ef1cbc6  43 hours ago    261 MB
docker.io/library/nginx  latest      177015cbaee5  2 days ago      155 MB
admin@i-0d2c5500082a69a52:~$ ./agent/check.sh
OK
And that's it? This feels... off. Compared with previous days, it's just... underwhelming.
Sumé: Tied in a Knot #
Description
A DNS server running Knot DNS is serving the zone sadservers.internal (see ls /var/lib/knot/zones/), but users are reporting that they cannot access blog.sadservers.internal neither api.sadservers.internal. Your task is to diagnose and fix the DNS issues so the services become accessible.
You can manage Knot DNS with sudo knotc commands.
Note: the 203.0.113.0/24 range is part of TEST-NET-3, a block reserved by RFC 5737 for documentation and examples, making it a Bogon IP range.
Now we're talking! At last, a DNS problem. Let's dive in and find what's wrong with the task. We'll start with a quick situation survey.
bashadmin@ip-172-31-29-190:~$ ls /var/lib/knot/zones/
sadservers.internal.zone
admin@ip-172-31-29-190:~$ cat /var/lib/knot/zones/sadservers.internal.zone
$ORIGIN sadservers.internal.
$TTL 3600

@       IN  SOA ns1.sadservers.internal. admin.sadservers.internal. (
            2024120901  ; Serial
            3600        ; Refresh
            1800        ; Retry
            604800      ; Expire
            86400 )     ; Minimum TTL

; Name servers
@       IN  NS  ns1.sadservers.internal.
ns1.     IN  A   10.1.11.56

www     IN  A   198.51.100.99
blog    IN  CNAM www.sadservers.internal
admin@ip-172-31-29-190:~$ systemctl status knot
● knot.service - Knot DNS server
     Loaded: loaded (/usr/lib/systemd/system/knot.service; enabled; preset: enabled)
     Active: active (running) since Fri 2025-12-12 08:30:04 UTC; 59s ago
 Invocation: 75628eb670514e5aa0fd4153c2a293e9
       Docs: man:knotd(8)
             man:knot.conf(5)
             man:knotc(8)
   Main PID: 823 (knotd)
      Tasks: 16 (limit: 503)
     Memory: 8.3M (peak: 9.3M, swap: 4K, swap peak: 4K)
        CPU: 71ms
     CGroup: /system.slice/knot.service
             └─823 /usr/sbin/knotd -m 512

Dec 12 08:30:04 ip-172-31-29-190 knotd[823]: info: [sadservers.internal.] zone will be loaded
Dec 12 08:30:04 ip-172-31-29-190 knotd[823]: info: starting server
Dec 12 08:30:04 ip-172-31-29-190 knotd[823]: error: [sadservers.internal.] zone loader, error in zone, file '/var/lib/knot/zones/sadservers>
Dec 12 08:30:04 ip-172-31-29-190 knotd[823]: error: [sadservers.internal.] zone loader, error in zone, file '/var/lib/knot/zones/sadservers>
Dec 12 08:30:04 ip-172-31-29-190 knotd[823]: error: [sadservers.internal.] zone loader, failed to load zone, file '/var/lib/knot/zones/sads>
Dec 12 08:30:04 ip-172-31-29-190 knotd[823]: error: [sadservers.internal.] failed to parse zone file '/var/lib/knot/zones/sadservers.intern>
Dec 12 08:30:04 ip-172-31-29-190 knotd[823]: error: [sadservers.internal.] zone event 'load' failed (failed)
Dec 12 08:30:04 ip-172-31-29-190 knotd[823]: info: control, binding to '/run/knot/knot.sock'
Dec 12 08:30:04 ip-172-31-29-190 systemd[1]: Started knot.service - Knot DNS server.
Dec 12 08:30:04 ip-172-31-29-190 knotd[823]: info: server started in the foreground, PID 823
admin@ip-172-31-29-190:~$ journalctl -feu knot
Dec 12 08:30:04 ip-172-31-29-190 systemd[1]: Starting knot.service - Knot DNS server...
Dec 12 08:30:04 ip-172-31-29-190 knotc[762]: Configuration is valid
Dec 12 08:30:04 ip-172-31-29-190 knotd[823]: info: Knot DNS 3.4.6 starting
Dec 12 08:30:04 ip-172-31-29-190 knotd[823]: info: loaded configuration file '/etc/knot/knot.conf', mapsize 512 MiB
Dec 12 08:30:04 ip-172-31-29-190 knotd[823]: info: using UDP reuseport, incoming TCP Fast Open
Dec 12 08:30:04 ip-172-31-29-190 knotd[823]: info: binding to interface 0.0.0.0@53
Dec 12 08:30:04 ip-172-31-29-190 knotd[823]: info: binding to interface ::@53
Dec 12 08:30:04 ip-172-31-29-190 knotd[823]: info: loading 1 zones
Dec 12 08:30:04 ip-172-31-29-190 knotd[823]: info: [sadservers.internal.] zone will be loaded
Dec 12 08:30:04 ip-172-31-29-190 knotd[823]: info: starting server
Dec 12 08:30:04 ip-172-31-29-190 knotd[823]: error: [sadservers.internal.] zone loader, error in zone, file '/var/lib/knot/zones/sadservers.internal.zone', line 13 (invalid address character)
Dec 12 08:30:04 ip-172-31-29-190 knotd[823]: error: [sadservers.internal.] zone loader, error in zone, file '/var/lib/knot/zones/sadservers.internal.zone', line 16 (unsupported record type)
Dec 12 08:30:04 ip-172-31-29-190 knotd[823]: error: [sadservers.internal.] zone loader, failed to load zone, file '/var/lib/knot/zones/sadservers.internal.zone', 2 errors
Dec 12 08:30:04 ip-172-31-29-190 knotd[823]: error: [sadservers.internal.] failed to parse zone file '/var/lib/knot/zones/sadservers.internal.zone' (failed)
Dec 12 08:30:04 ip-172-31-29-190 knotd[823]: error: [sadservers.internal.] zone event 'load' failed (failed)
Dec 12 08:30:04 ip-172-31-29-190 knotd[823]: info: control, binding to '/run/knot/knot.sock'
Dec 12 08:30:04 ip-172-31-29-190 systemd[1]: Started knot.service - Knot DNS server.
Dec 12 08:30:04 ip-172-31-29-190 knotd[823]: info: server started in the foreground, PID 823
^C
admin@ip-172-31-29-190:~$ cat -n /var/lib/knot/zones/sadservers.internal.zone
     1  $ORIGIN sadservers.internal.
     2  $TTL 3600
     3
     4  @       IN  SOA ns1.sadservers.internal. admin.sadservers.internal. (
     5              2024120901  ; Serial
     6              3600        ; Refresh
     7              1800        ; Retry
     8              604800      ; Expire
     9              86400 )     ; Minimum TTL
    10
    11  ; Name servers
    12  @       IN  NS  ns1.sadservers.internal.
    13  ns1.     IN  A   10.1.11.56
    14
    15  www     IN  A   198.51.100.99
    16  blog    IN  CNAM www.sadservers.internal
That's a good start: we see that the DNS service knot is working, but the configuration file is incorrect. If we look closer at the .zone file, we can see several issues:
- The most obvious one: a typo in the record type name -- it's
CNAME, notCNAM. - The not-so-obvious one: the
blogsubrecord points towww.sadservers.internal. Why is this an error? The final record name will be appended withsadservers.internal, making it the very unpleasantwww.sadservers.internal.sadservers.internal. I highly doubt we need that domain. - An extra dot in the
ns1.record name. When creating records in web interfaces, such symbols usually get stripped, so let's also remove this dot.
Let's check if our changes solved the issues.
bashadmin@ip-172-31-29-190:~$ sudo vim /var/lib/knot/zones/sadservers.internal.zone
admin@ip-172-31-29-190:~$ cat -n /var/lib/knot/zones/sadservers.internal.zone
     1  $ORIGIN sadservers.internal.
     2  $TTL 3600
     3
     4  @       IN  SOA ns1.sadservers.internal. admin.sadservers.internal. (
     5              2024120901  ; Serial
     6              3600        ; Refresh
     7              1800        ; Retry
     8              604800      ; Expire
     9              86400 )     ; Minimum TTL
    10
    11  ; Name servers
    12  @       IN  NS  ns1.sadservers.internal.
    13  ns1     IN  A   10.1.11.56
    14
    15  www     IN  A   198.51.100.99
    16  blog    IN  CNAME www
admin@ip-172-31-29-190:~$ sudo systemctl restart knot
admin@ip-172-31-29-190:~$ systemctl status knot
● knot.service - Knot DNS server
     Loaded: loaded (/usr/lib/systemd/system/knot.service; enabled; preset: enabled)
     Active: active (running) since Fri 2025-12-12 08:32:46 UTC; 4s ago
 Invocation: 36f7463d84f14806abf48fb3a288a6ac
       Docs: man:knotd(8)
             man:knot.conf(5)
             man:knotc(8)
    Process: 1593 ExecStartPre=/usr/sbin/knotc conf-check (code=exited, status=0/SUCCESS)
   Main PID: 1597 (knotd)
      Tasks: 17 (limit: 503)
     Memory: 3.1M (peak: 3.6M)
        CPU: 46ms
     CGroup: /system.slice/knot.service
             └─1597 /usr/sbin/knotd -m 512

Dec 12 08:32:46 ip-172-31-29-190 knotd[1597]: info: loading 1 zones
Dec 12 08:32:46 ip-172-31-29-190 knotd[1597]: info: [sadservers.internal.] zone will be loaded
Dec 12 08:32:46 ip-172-31-29-190 knotd[1597]: info: starting server
Dec 12 08:32:46 ip-172-31-29-190 knotd[1597]: warning: [sadservers.internal.] zone loader, ignoring out-of-zone data, owner ns1.
Dec 12 08:32:46 ip-172-31-29-190 knotd[1597]: warning: [sadservers.internal.] check, node sadservers.internal., missing glue record
Dec 12 08:32:46 ip-172-31-29-190 knotd[1597]: info: [sadservers.internal.] zone file parsed, serial 2024120901
Dec 12 08:32:46 ip-172-31-29-190 knotd[1597]: info: [sadservers.internal.] loaded, serial none -> 2024120901, 279 bytes
Dec 12 08:32:46 ip-172-31-29-190 knotd[1597]: info: control, binding to '/run/knot/knot.sock'
Dec 12 08:32:46 ip-172-31-29-190 knotd[1597]: info: server started in the foreground, PID 1597
Dec 12 08:32:46 ip-172-31-29-190 systemd[1]: Started knot.service - Knot DNS server.
admin@ip-172-31-29-190:~$ ./agent/check.sh
NO
Well, knot can properly parse the configuration now, but the task is still incomplete. Let's dive deeper to see why that is.
bashadmin@ip-172-31-29-190:~$ dig blog.sadservers.internal

; <<>> DiG 9.20.15-1~deb13u1-Debian <<>> blog.sadservers.internal
;; global options: +cmd
;; Got answer:
;; ->>HEADER<<- opcode: QUERY, status: NXDOMAIN, id: 28647
;; flags: qr aa rd; QUERY: 1, ANSWER: 1, AUTHORITY: 1, ADDITIONAL: 1
;; WARNING: recursion requested but not available

;; OPT PSEUDOSECTION:
; EDNS: version: 0, flags:; udp: 1232
;; QUESTION SECTION:
;blog.sadservers.internal.      IN      A

;; ANSWER SECTION:
blog.sadservers.internal. 3600  IN      CNAME   www.sadservers.internal.sadservers.internal.

;; AUTHORITY SECTION:
sadservers.internal.    3600    IN      SOA     ns1.sadservers.internal. admin.sadservers.internal. 2024120901 3600 1800 604800 86400

;; Query time: 0 msec
;; SERVER: 127.0.0.1#53(127.0.0.1) (UDP)
;; WHEN: Fri Dec 12 08:33:15 UTC 2025
;; MSG SIZE  rcvd: 137

admin@ip-172-31-29-190:~$ host blog.sadservers.internal
Host blog.sadservers.internal not found: 3(NXDOMAIN)
admin@ip-172-31-29-190:~$ nslookup blog.sadservers.internal
;; Got recursion not available from 127.0.0.1
Server:         127.0.0.1
Address:        127.0.0.1#53

** server can't find blog.sadservers.internal: NXDOMAIN
All right, we still can't find the necessary domains.
bashadmin@ip-172-31-29-190:~$ dig NS sadservers.internal

; <<>> DiG 9.20.15-1~deb13u1-Debian <<>> NS sadservers.internal
;; global options: +cmd
;; Got answer:
;; ->>HEADER<<- opcode: QUERY, status: NOERROR, id: 11643
;; flags: qr aa rd; QUERY: 1, ANSWER: 1, AUTHORITY: 0, ADDITIONAL: 1
;; WARNING: recursion requested but not available

;; OPT PSEUDOSECTION:
; EDNS: version: 0, flags:; udp: 1232
;; QUESTION SECTION:
;sadservers.internal.           IN      NS

;; ANSWER SECTION:
sadservers.internal.    3600    IN      NS      ns1.sadservers.internal.

;; Query time: 0 msec
;; SERVER: 127.0.0.1#53(127.0.0.1) (UDP)
;; WHEN: Fri Dec 12 08:37:39 UTC 2025
;; MSG SIZE  rcvd: 66

admin@ip-172-31-29-190:~$ dig A www.sadservers.internal

; <<>> DiG 9.20.15-1~deb13u1-Debian <<>> A www.sadservers.internal
;; global options: +cmd
;; Got answer:
;; ->>HEADER<<- opcode: QUERY, status: NOERROR, id: 53936
;; flags: qr aa rd; QUERY: 1, ANSWER: 1, AUTHORITY: 0, ADDITIONAL: 1
;; WARNING: recursion requested but not available

;; OPT PSEUDOSECTION:
; EDNS: version: 0, flags:; udp: 1232
;; QUESTION SECTION:
;www.sadservers.internal.       IN      A

;; ANSWER SECTION:
www.sadservers.internal. 3600   IN      A       198.51.100.99

;; Query time: 0 msec
;; SERVER: 127.0.0.1#53(127.0.0.1) (UDP)
;; WHEN: Fri Dec 12 08:37:50 UTC 2025
;; MSG SIZE  rcvd: 68
admin@ip-172-31-29-190:~$ dig A ns1.sadservers.internal

; <<>> DiG 9.20.15-1~deb13u1-Debian <<>> A ns1.sadservers.internal
;; global options: +cmd
;; Got answer:
;; ->>HEADER<<- opcode: QUERY, status: NOERROR, id: 59867
;; flags: qr aa rd; QUERY: 1, ANSWER: 1, AUTHORITY: 0, ADDITIONAL: 1
;; WARNING: recursion requested but not available

;; OPT PSEUDOSECTION:
; EDNS: version: 0, flags:; udp: 1232
;; QUESTION SECTION:
;ns1.sadservers.internal.       IN      A

;; ANSWER SECTION:
ns1.sadservers.internal. 3600   IN      A       10.1.11.56

;; Query time: 0 msec
;; SERVER: 127.0.0.1#53(127.0.0.1) (UDP)
;; WHEN: Fri Dec 12 08:39:22 UTC 2025
;; MSG SIZE  rcvd: 68
Okay. The NS record resolves correctly. But can we resolve the DNS server itself?
bashadmin@ip-172-31-29-190:~$ telnet ns1.sadservers.internal 53
Trying 10.1.11.56...
Connected to ns1.sadservers.internal.
Escape character is '^]'.
^]
telnet>
Connection closed.
Okay, it's working. The A records, however, show some interesting information: the ns1 domain resolves to a local address, whereas www points to the outside internet. Perhaps it's unavailable?
bashadmin@ip-172-31-29-190:~$ curl -v blog.sadservers.internal
* Host blog.sadservers.internal:80 was resolved.
* IPv6: (none)
* IPv4: 198.51.100.99
*   Trying 198.51.100.99:80...
^C
Yeah, I thought as much. Okay, that has to be changed, but to what?
bashadmin@ip-172-31-29-190:~$ ip a
1: lo: <LOOPBACK,UP,LOWER_UP> mtu 65536 qdisc noqueue state UNKNOWN group default qlen 1000
    link/loopback 00:00:00:00:00:00 brd 00:00:00:00:00:00
    inet 127.0.0.1/8 scope host lo
       valid_lft forever preferred_lft forever
    inet 203.0.113.10/32 scope global lo
       valid_lft forever preferred_lft forever
    inet 203.0.113.20/32 scope global lo
       valid_lft forever preferred_lft forever
    inet6 ::1/128 scope host noprefixroute
       valid_lft forever preferred_lft forever
2: ens5: <BROADCAST,MULTICAST,UP,LOWER_UP> mtu 9001 qdisc mq state UP group default qlen 1000
    link/ether 02:94:b1:aa:84:97 brd ff:ff:ff:ff:ff:ff
    altname enp0s5
    altname enx0294b1aa8497
    inet 10.1.11.56/24 metric 100 brd 10.1.11.255 scope global dynamic ens5
       valid_lft 2581sec preferred_lft 2581sec
    inet6 fe80::94:b1ff:feaa:8497/64 scope link proto kernel_ll
       valid_lft forever preferred_lft forever
...
So the IP ranges mentioned in the task description are meant to be used, it seems. Let's adjust the blog and api records to point to the loopback address.
bashadmin@ip-172-31-29-190:~$ sudo vim /var/lib/knot/zones/sadservers.internal.zone
admin@ip-172-31-29-190:~$ cat /var/lib/knot/zones/sadservers.internal.zone
$ORIGIN sadservers.internal.
$TTL 3600

@       IN  SOA ns1.sadservers.internal. admin.sadservers.internal. (
            2024120901  ; Serial
            3600        ; Refresh
            1800        ; Retry
            604800      ; Expire
            86400 )     ; Minimum TTL

; Name servers
@       IN  NS  ns1.sadservers.internal.
ns1     IN  A   10.1.11.56

www     IN  A   203.0.113.10
blog    IN  CNAME www
api     IN  CNAME www
admin@ip-172-31-29-190:~$ sudo systemctl restart knot
admin@ip-172-31-29-190:~$ curl blog.sadservers.internal
Welcome to blog.sadservers.internal
# yay
admin@ip-172-31-29-190:~$ curl api.sadservers.internal
curl: (6) Could not resolve host: api.sadservers.internal
# nay
Ah, dang, we're so close! Luckily, we have a second breakfast loopback address.
bashadmin@ip-172-31-29-190:~$ sudo vim /var/lib/knot/zones/sadservers.internal.zone
admin@ip-172-31-29-190:~$ cat /var/lib/knot/zones/sadservers.internal.zone
$ORIGIN sadservers.internal.
$TTL 3600

@       IN  SOA ns1.sadservers.internal. admin.sadservers.internal. (
            2024120901  ; Serial
            3600        ; Refresh
            1800        ; Retry
            604800      ; Expire
            86400 )     ; Minimum TTL

; Name servers
@       IN  NS  ns1.sadservers.internal.
ns1     IN  A   10.1.11.56

www     IN  A   203.0.113.10
blog    IN  CNAME www
api     IN  A   203.0.113.20
admin@ip-172-31-29-190:~$ sudo systemctl restart knot
admin@ip-172-31-29-190:~$ curl -v api.sadservers.internal
* Host api.sadservers.internal:80 was resolved.
* IPv6: (none)
* IPv4: 203.0.113.20
*   Trying 203.0.113.20:80...
* Connected to api.sadservers.internal (203.0.113.20) port 80
* using HTTP/1.x
> GET / HTTP/1.1
> Host: api.sadservers.internal
> User-Agent: curl/8.14.1
> Accept: */*
>
* Request completely sent off
< HTTP/1.1 200 OK
< Server: nginx/1.29.4
< Date: Fri, 12 Dec 2025 08:49:49 GMT
< Content-Type: application/json
< Content-Length: 55
< Connection: keep-alive
<
{"status": "ok", "service": "api.sadservers.internal"}
* Connection #0 to host api.sadservers.internal left intact
admin@ip-172-31-29-190:~$ ./agent/check.sh
OK
And there we have it! An oh-so-interesting task -- it was so much fun to think through and figure out the steps to complete it. Only one left to go this season!
Karakorum: WTFIT – What The Fun Is This? #
Description
There's a binary at /home/admin/wtfit that nobody knows how it works or what it does ("what the fun is this"). Someone remembers something about wtfit needing to communicate to a service in order to start.
Run this wtfit program so it doesn't exit with an error, fixing or working around things that you need but are broken in this server.
The time is nigh. The final challenge approacheth. The toughest, ugliest of them all. Can't wait to solve it!
As always, we start with an overview. What are we dealing with?
bashadmin@ip-10-1-13-85:/$
Huh? Why are we in the root directory all of a sudden?
bashadmin@ip-10-1-13-85:~$ ls -l
total 6236
drwxr-xr-x 2 admin admin    4096 Sep 13  2022 agent
-rw-r--r-- 1 admin admin 6381234 Sep 13  2022 wtfit
admin@ip-10-1-13-85:~$ chmod +x wtfit
bash: /usr/bin/chmod: Permission denied
admin@ip-10-1-13-85:~$ sudo !!
sudo chmod +x wtfit
sudo: chmod: command not found
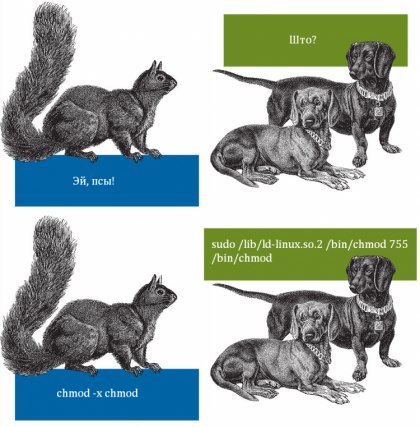
There's our crown jewel -- a binary file that we have to figure out. I see that it's not executable yet, let's fix this and... Is that?.. Is that what I think this is? Is that my favourite comic[3] come true?
I'VE BEEN PREPARING FOR THIS MOMENT MY WHOLE LIFE
bashadmin@ip-10-1-13-85:~$ sudo /usr/lib64/ld-linux-x86-64.so.2 /usr/bin/chmod +x /usr/bin/chmod
admin@ip-10-1-13-85:~$ chmod +x wtfit
admin@ip-10-1-13-85:~$ ./wtfit
ERROR: can't open config file
Aw yiss, finally, memes come in handy!
And the rest is a walk in the park (I assume). From the beginning, I thought we would have to work with strace, as this program shows all the system calls -- including the ones we may need: opening files.
bashadmin@ip-10-1-13-85:~$ strace -f -e trace=file ./wtfit
execve("./wtfit", ["./wtfit"], 0x7ffcaa6ec5f8 /* 14 vars */) = 0
openat(AT_FDCWD, "/sys/kernel/mm/transparent_hugepage/hpage_pmd_size", O_RDONLY) = 3
strace: Process 875 attached
strace: Process 876 attached
strace: Process 877 attached
[pid   874] openat(AT_FDCWD, "/home/admin/wtfitconfig.conf", O_RDONLY|O_CLOEXEC) = -1 ENOENT (No such file or directory)
ERROR: can't open config file
[pid   875] +++ exited with 1 +++
[pid   876] +++ exited with 1 +++
[pid   877] +++ exited with 1 +++
+++ exited with 1 +++
admin@ip-10-1-13-85:~$ touch /home/admin/wtfitconfig.conf
admin@ip-10-1-13-85:~$ ./wtfit
ERROR: can't connect to server
Yep, there actually was a file we were missing -- wtfitconfig.conf. I created it; luckily, its existence was enough. But to proceed further, we need some more actions -- specifically, the binary has to connect to a server. Let's figure out which server it looks for. Again -- with the help of strace. I use the -f flag to follow child process calls as well, along with -e trace=network to track only certain traces.
bashadmin@ip-10-1-13-85:~$ strace -f -e trace=network ./wtfit
strace: Process 891 attached
strace: Process 892 attached
strace: Process 893 attached
[pid   890] socket(AF_INET, SOCK_STREAM|SOCK_CLOEXEC|SOCK_NONBLOCK, IPPROTO_IP) = 3
[pid   890] connect(3, {sa_family=AF_INET, sin_port=htons(7777), sin_addr=inet_addr("127.0.0.1")}, 16) = -1 EINPROGRESS (Operation now in progress)
[pid   890] getsockopt(3, SOL_SOCKET, SO_ERROR, [ECONNREFUSED], [4]) = 0
ERROR: can't connect to server
[pid   893] +++ exited with 1 +++
[pid   892] +++ exited with 1 +++
[pid   891] +++ exited with 1 +++
+++ exited with 1 +++
From the output, we can see that the program is looking for a server running on 127.0.0.1:7777. A quick survey with ss shows that it's actually empty:
bashadmin@ip-10-1-13-85:~$ sudo ss -tunlp | grep 7777
admin@ip-10-1-13-85:~$
Well, since we need only a server, perhaps we can use nginx?
bashadmin@ip-10-1-13-85:~$ cd /etc/nginx
admin@ip-10-1-13-85:/etc/nginx$ ls -l
total 64
drwxr-xr-x 2 root root 4096 May 14  2022 conf.d
-rw-r--r-- 1 root root 1125 May 29  2021 fastcgi.conf
-rw-r--r-- 1 root root 1055 May 29  2021 fastcgi_params
-rw-r--r-- 1 root root 2837 May 29  2021 koi-utf
-rw-r--r-- 1 root root 2223 May 29  2021 koi-win
-rw-r--r-- 1 root root 3957 May 29  2021 mime.types
drwxr-xr-x 2 root root 4096 May 14  2022 modules-available
drwxr-xr-x 2 root root 4096 Sep 13  2022 modules-enabled
-rw-r--r-- 1 root root 1447 May 29  2021 nginx.conf
-rw-r--r-- 1 root root  180 May 29  2021 proxy_params
-rw-r--r-- 1 root root  636 May 29  2021 scgi_params
drwxr-xr-x 2 root root 4096 Sep 13  2022 sites-available
drwxr-xr-x 2 root root 4096 Sep 13  2022 sites-enabled
drwxr-xr-x 2 root root 4096 Sep 13  2022 snippets
-rw-r--r-- 1 root root  664 May 29  2021 uwsgi_params
-rw-r--r-- 1 root root 3071 May 29  2021 win-utf
admin@ip-10-1-13-85:/etc/nginx$ grep listen sites-enabled/default
        listen 80 default_server;
        listen [::]:80 default_server;
        # listen 443 ssl default_server;
        # listen [::]:443 ssl default_server;
#       listen 80;
#       listen [::]:80;
admin@ip-10-1-13-85:/etc/nginx$ sudo sed -i 's/80/7777/' sites-enabled/default
admin@ip-10-1-13-85:/etc/nginx$ grep listen sites-enabled/default
        listen 7777 default_server;
        listen [::]:7777 default_server;
        # listen 443 ssl default_server;
        # listen [::]:443 ssl default_server;
#       listen 7777;
#       listen [::]:7777;
admin@ip-10-1-13-85:/etc/nginx$ sudo systemctl restart nginx
admin@ip-10-1-13-85:/etc/nginx$ ss -ntupl | grep 7777
tcp   LISTEN 0      511                            0.0.0.0:7777      0.0.0.0:*
tcp   LISTEN 0      511                               [::]:7777         [::]:*
admin@ip-10-1-13-85:/etc/nginx$ cd
admin@ip-10-1-13-85:~$ ./wtfit
OK.
And we in fact can! Truth be told, I wasn't expecting to solve the "hard" task that easily. After figuring out the proper tool (strace) and probing several possible solutions, it was a breeze. I think the major roadblock would have been the non-executable chmod, but boy was I glad to put my meme degree to good use!
With the successful completion of the last task, Advent of Sysadmin 2025 is officially over! Thanks to everyone who joined me over the last 12 days -- it was challenging work (as many updates as the whole previous year combined), but I also had so much fun solving certain challenges. See you in the next one!
jq is technically a JSON query language, so that figures. ↩︎
In hindsight, I realized I was correct the first time -- I solved it slightly wrong, but got a working result nonetheless. ↩︎
The comic reads: "Hey doggos!" -- "Whot" -- "chmod -x chmod" -- "sudo /lib/ld-linux.so.2 /bin/chmod 755 /bin/chmod" ↩︎